

Introduction to Spring Expression Language (SpEL)
6 CommentsLast Updated on June 26, 2019 by Simanta
Introduction
Spring 3 introduced the Spring Expression Language (SpEL) which has a syntax similar to Unified EL. It can save you a lot of coding, because you can dynamically assign values at runtime.
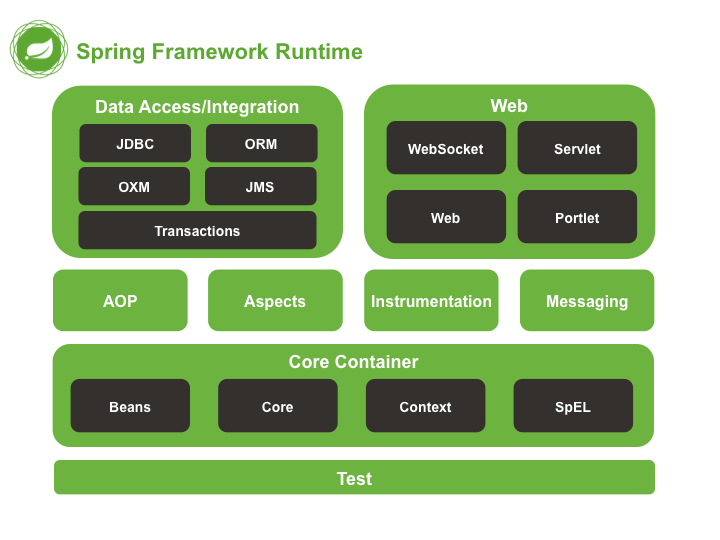
The folks at Spring, made the Spring Expression Language part of what is considered ‘Spring Core’. Thus, the Spring Expression Language is available for use throughout the Spring Framework.
SpEL can be configured through files and bean classes using XML and respectively Java annotation.
Spring Expression Language Examples
Project Setup
In this introductory course we will demonstrate how to use SpEL with XML and annotation based configuration to implement a simple example.
The @Component annotation is used to register the component in Spring. Here are two components annotated correspondingly :
package springspelexample;

import org.springframework.stereotype.Component;

@Component("companyBean")
public class Company {

	private long businessNumber;

	private String name;

	public long getBusinessNumber() {
		return businessNumber;
	}

	public void setBusinessNumber(long businessNumber) {
		this.businessNumber = businessNumber;
	}

	public String getName() {
		return name;
	}

	public void setName(String name) {
		this.name = name;
	}

	@Override
	public String toString(){
		return name;
	}
}
package springspelexample;


import org.springframework.stereotype.Component;

@Component("employeeBean")
public class Employee {

	private String name;

	private Company company;

	private String departmentName;

	public String getName() {
		return name;
	}

	public void setName(String name) {
		this.name = name;
	}

	public Company getCompany() {
		return company;
	}

	public void setCompany(Company company) {
		this.company = company;
	}

	public String getDepartmentName() {
		return departmentName;
	}

	public void setDepartmentName(String departmentName) {
		this.departmentName = departmentName;
	}

	@Override
	public String toString(){
		return "Employee " +name + " in " +company   +" and department " + departmentName ;
	}
}
We run the application using the App class.
In the first step:
ConfigurableApplicationContext context = new ClassPathXmlApplicationContext("applicationContext.xml");
we create an application context using ClassPathXmlApplicationContext which loads the configuration from bean file which is located in class path of the application.
Subsequent steps load the beans (in our case Employee and Company) from the context.
In the end: context.close() the ConfigurableApplicationContext.close() will close the application context, releasing all resources and also destroying all cached singleton beans.
package springspelexample;

import org.springframework.context.ConfigurableApplicationContext;
import org.springframework.context.support.ClassPathXmlApplicationContext;

public class App {


	public static void main(String[] args) {

			ConfigurableApplicationContext context = new ClassPathXmlApplicationContext("applicationContext.xml");
			Employee employee = (Employee) context.getBean("employeeBean");
			Company company = (Company) context.getBean("companyBean");

			Student student = (Student) context.getBean("studentBean");
			College college = (College) context.getBean("collegeBean");

			ProjectEnvironment pe = (ProjectEnvironment) context.getBean("projectEnvBean");

			SecondProjectEnvironment pe2 = (SecondProjectEnvironment) context.getBean("secondProjectEnvBean");

			System.out.println(employee.toString());

			System.out.println(student.toString());

			System.out.println(pe.toString());

			System.out.println(pe2.toString());

			context.close();
	}

}
where applicationContext.xml content is:
<beans xmlns="http://www.springframework.org/schema/beans"
	xmlns:xsi="http://www.w3.org/2001/XMLSchema-instance" xmlns:p="http://www.springframework.org/schema/p"
	xmlns:aop="http://www.springframework.org/schema/aop" xmlns:context="http://www.springframework.org/schema/context"
	xmlns:jee="http://www.springframework.org/schema/jee" xmlns:tx="http://www.springframework.org/schema/tx"
	xmlns:task="http://www.springframework.org/schema/task"
	xsi:schemaLocation="http://www.springframework.org/schema/aop http://www.springframework.org/schema/aop/spring-aop-3.2.xsd http://www.springframework.org/schema/beans http://www.springframework.org/schema/beans/spring-beans-3.2.xsd http://www.springframework.org/schema/context http://www.springframework.org/schema/context/spring-context-3.2.xsd http://www.springframework.org/schema/jee http://www.springframework.org/schema/jee/spring-jee-3.2.xsd http://www.springframework.org/schema/tx http://www.springframework.org/schema/tx/spring-tx-3.2.xsd http://www.springframework.org/schema/task http://www.springframework.org/schema/task/spring-task-3.2.xsd">


    <context:component-scan base-package="com.springframeworkguru.snippets.enterprise" />


    <bean id="companyBean" class="springspelexample.Company">
        <property name="businessNumber" value="12345" />
        <property name="name" value="Acme Company" />
    </bean>
    <bean id="employeeBean" class="springspelexample.Employee">
        <property name="name" value="James Smith" />
        <property name="departmentName" value="Information Technology" />
        <property name="company" value="#{companyBean}" />
    </bean>

    <bean id="studentBean" class="springspelexample.Student">
       <property name="college" value="#{collegeBean}" />
    </bean>
    <bean id="collegeBean" class="springspelexample.College"/>

    <bean id="projectEnvBean" class="springspelexample.ProjectEnvironment"/>

    <bean id="secondProjectEnvBean" class="springspelexample.SecondProjectEnvironment"/>


</beans>
The applicationContext.xml can enable the auto component-scan to avoid bean declaration in XML file:
<context:component-scan base-package="com.springframeworkguru.snippets.enterprise" />
Once we created source and bean configuration files, let us run the application. The output will be:
Employee James Smith in Acme Company company and department Information Technology
Project Dependencies:
For a Maven project the pom.xml file is:
	4.0.0
	com.javacodegeeks.snippets.enterprise
	springspelexample
	0.0.1-SNAPSHOT


			org.springframework
			spring-core
			${spring.version}


			org.springframework
			spring-context
			${spring.version}


		4.1.6.RELEASE
Annotation-based configuration
The @Value annotation allows to specify a default value by placing it on fields, methods and method/constructor parameters.
College.java:
package springspelexample;

import org.springframework.beans.factory.annotation.Value;
import org.springframework.stereotype.Component;


@Component("collegeBean")
public class College {


    @Value("Eastern Florida State College")
	private String collgeName;

	@Value("7547")
	private int noStudentsEnrolled;


	public int getNoStudentsEnrolled() {
		return noStudentsEnrolled;
	}

	public void setNoStudentsEnrolled(int noStudentsEnrolled) {
		this.noStudentsEnrolled = noStudentsEnrolled;
	}

	public String getCollgeName() {
		return collgeName;
	}

	public void setCollgeName(String collgeName) {
		this.collgeName = collgeName;
	}

	@Override
	public String toString(){
		return collgeName;
	}
}
Student.java:
package springspelexample;


import org.springframework.stereotype.Component;

@Component("employeeBean")
public class Employee {

	private String name;

	private Company company;

	private String departmentName;

	public String getName() {
		return name;
	}

	public void setName(String name) {
		this.name = name;
	}

	public Company getCompany() {
		return company;
	}

	public void setCompany(Company company) {
		this.company = company;
	}

	public String getDepartmentName() {
		return departmentName;
	}

	public void setDepartmentName(String departmentName) {
		this.departmentName = departmentName;
	}

	@Override
	public String toString(){
		return "Employee " +name + " in " +company   +" and department " + departmentName ;
	}
}
after we add in App class the lines:
	Student student = (Student) context.getBean("studentBean");
	College college = (College) context.getBean("collegeBean");

	System.out.println("\n" +student.toString());
and run again we will get as result:
Student James Smith from Eastern Florida State College with a Computer Science major
What is actually happening :
1.Beans definitions are loaded
This means scanning the application context XML files, the packages defined by component-scan, and loading the bean definitions found into the bean factory.
2.The beans are instantiated and stored in the application context
The bean factory creates each bean from the bean definitions, while the bean dependencies get injected.
3.The beans are post processed
All initializing methods declared in the XML method will be executed, while Annotations will be validated.
XML Based Configuration
Literal Values
We used literal values to bean properties:
     <property name="businessNumber" value="12345" />
     <property name="name" value="Acme Company" />

     <property name="name" value="James Smith" />
     <property name="departmentName" value="Information Technology" />
Any data type can be used.
Bean Reference
we can refer other spring beans using SpEL:
<property name="company" value="#{companyBean}" />which can be also written:
<property name="company" ref="companyBean" />
The outcome from both the above expressions is same.
Property references
We can use literal values to bean properties using SpEL:
 <bean id="job">
        <property name="skill" value="Spring Expression Language" />
    </bean>
for a nested property value a period (.) is used
    <bean id="employee">
	   <property name="employee_skill" value="#{job.skill}" />
    </bean>
for which is the same as:
Employee employee = new Employee();
employee.setEmployee_skills(job.getSkill());
Method references
are the way a method references another bean:
<property name="quote" value="employee.timeInHoursForProject()" />

  <property name="employeeName" value="employee.getName()" />
on which we can use operator for example:
<property name="employeeName" value="employee.getName().toUpperCase()" />
To avoid a NullPointerExeception we should use the Safe Navigation Operator ?.:
<property name="employeeName" value="employee.getName()?.toUpperCase()" />
SpEL Predefined Variables
In SpEL systemProperties and systemEnvironment are part of a Environment bean which provide information at runtime (late binding):
– systemProperties that contains the environment variables on the machine where the application is running.
– systemEnvironment – that is retrieving environment specific properties from the runtime environment, more specifically Java properties that we set in Java when the application started (using the -D argument)
Let’s first define an environment variable appHome with the value: C:/somePath and see how to make it available through SpEL.
After we autowire the Environment object in the current Spring container and we use the injected parameter by @Value in an instance variable of the class we have the environment variable we looking for.
Running it:
package springspelexample;

import org.springframework.beans.factory.annotation.Autowired;
import org.springframework.beans.factory.annotation.Value;
//import org.springframework.context.annotation.Configuration;
//import org.springframework.context.annotation.PropertySource;
import org.springframework.core.env.Environment;
import org.springframework.stereotype.Component;

// in case reading for config.properties in resources:
//@Configuration
//@PropertySource({
	//"classpath:config.properties"
//})
@Component("projectEnvBean")
public class ProjectEnvironment {

	 @Autowired
	 Environment environment;

	 //post Spring 3.2 syntax
	 @Value("#{ environment['appHome'] }")
	 private String appHome;

	public String getAppHome() {
		return appHome;
	}

	public void setAppHome(String appHome) {
		this.appHome = appHome;
	}


	 @Override
	 public String toString() {
		 return "environment variable value appHome = " +appHome.toString();
	 }

}
will give the same result: environment variable value appHome = C:/somePath as:
package springspelexample;

import org.springframework.beans.factory.annotation.Autowired;
import org.springframework.beans.factory.annotation.Value;
import org.springframework.context.annotation.Configuration;
import org.springframework.context.annotation.PropertySource;
import org.springframework.core.env.Environment;
import org.springframework.stereotype.Component;


@Configuration
@PropertySource({
	"classpath:config.properties"
})
@Component("secondProjectEnvBean")
public class SecondProjectEnvironment {

	 @Autowired
	 Environment environment;

	 //post Spring 3.2 syntax
	 @Value("#{ environment['appHome2'] }")
	 private String appHome2;

	public String getAppHome2() {
		return appHome2;
	}

	public void setAppHome2(String appHome2) {
		this.appHome2 = appHome2;
	}

	 @Override
	 public String toString() {
		 return "environment variable value appHome = " +appHome2.toString();
	 }

}
where in the configuration.properties file (under resources directory) we have defined: appHome=C:/somepath
In this example we used @PropertySource annotations to read properties file, annotation placed on core Spring configuration classes (@Configuration ).
Conclusion
The Spring Expression Language is a powerful feature of a the Spring Framework. As you develop enterprise class applications in Spring, you will frequently encounter uses for the Spring Expression Language. A very common use for the Spring Expression Language is in defining your database settings. In a typical enterprise, you will have a development environment, a QA or testing environment, and your production deployment environment. The database server and settings will be different for each of these environments. The Spring Expression Language makes it easy to externalize your database properties.

Charles Morin
Looks like a very unique feature for Spring. Very interesting. Thank you!
Saw Teck Rul
Spring Guru,
The image for student.java is wrong, it is showing the code from employee.java.
Seetesh
Till date it is not rectified