Common List Operations
0 CommentsLast Updated on January 14, 2021 by jt
List is one of the most commonly used collections in Java. Some List implementations are LinkedList, ArrayList, and Stack.
In this post, I will take you through some of the common operations performed on List.
Overview
In Java, List is an interface that provides the facility to maintain an ordered collection. It provides different methods that we can use to perform basic operations, such as inserting, updating, and deleting elements.
Since List is an interface, we can use it only with a class that implements it.
Let’s see how to perform some common List operations.
We will first use the LinkedList class to perform common List operations.
Performing Operations on LinkedList
The LinkedList class provides us a linear data structure. In a LinkedList, elements are linked with each other using pointers. Each element of the LinkedList has the reference (address/pointer) to the next element.
The code to create a LinkedList is this.
LinkedList<String> laptop = new LinkedList<>();
Once we created a LinkedList, we can add elements to it.
The code to add elements to a LinkedList is this.
laptop.add("HP");
laptop.add("Lenovo");
The output on running the program is this.
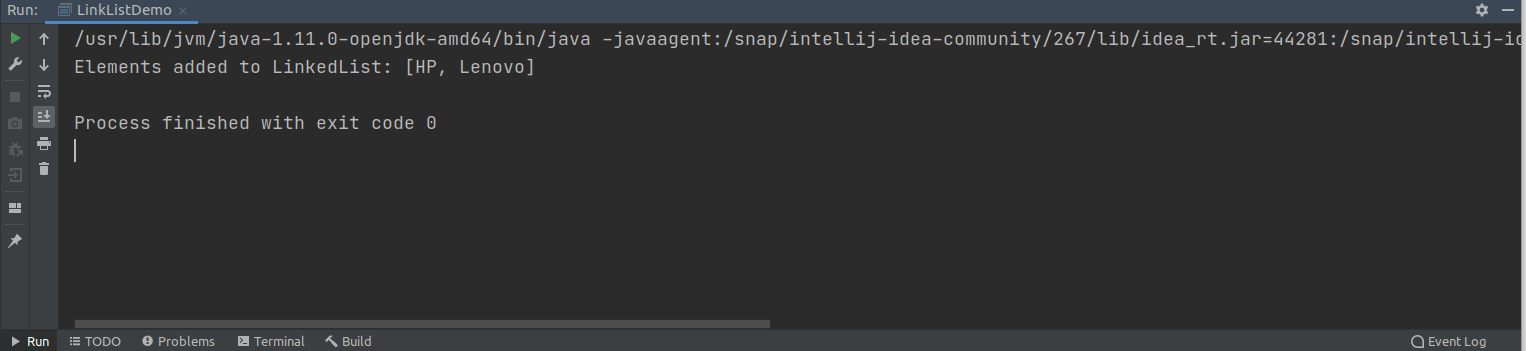
The output shows that a LinkedList is created and two elements are added to it.
We can also add elements to a LinkedList at a specified position, say the first position, last, or any position in between.
The code to add elements at different positions is this.
laptop.add(2, "Acer");
System.out.println("LinkedList after adding an element at third position: " +laptop);

laptop.addFirst("Apple");
System.out.println("LinkedList after the addFirst() method: " + laptop);

laptop.addLast("Compaq");
System.out.println("LinkedList after the addLast() method: " + laptop);
The output on running the program is this.

Once elements are added to the LinkedList, we can also change those elements when needed. We can do that using the set() method.
The code to update an element in the LinkedList is this.
laptop.set(3, "Dell");
System.out.println("Updated LinkedList after updating element at fourth position: " + laptop);
The output shows the updated element at the fourth position.

Next, we will perform the removal operation.
In LinkedList, we can remove an element from the first position, last, or from a specified index using various remove methods, like this.
laptop.removeFirst();
System.out.println("LinkedList after the removeFirst() method: " + laptop);

laptop.removeLast();
System.out.println("LinkedList after the removeLast() method: " + laptop);

laptop.remove(1);
System.out.println("LinkedList after deletion of Item from second position: " +laptop);
This code uses the removeFirst() and removeLast() methods of the LinkedList class that removes the first and last elements from the LinkedList. The remove() method removes an element from the specified index passed as parameter.
The output of the program is this.
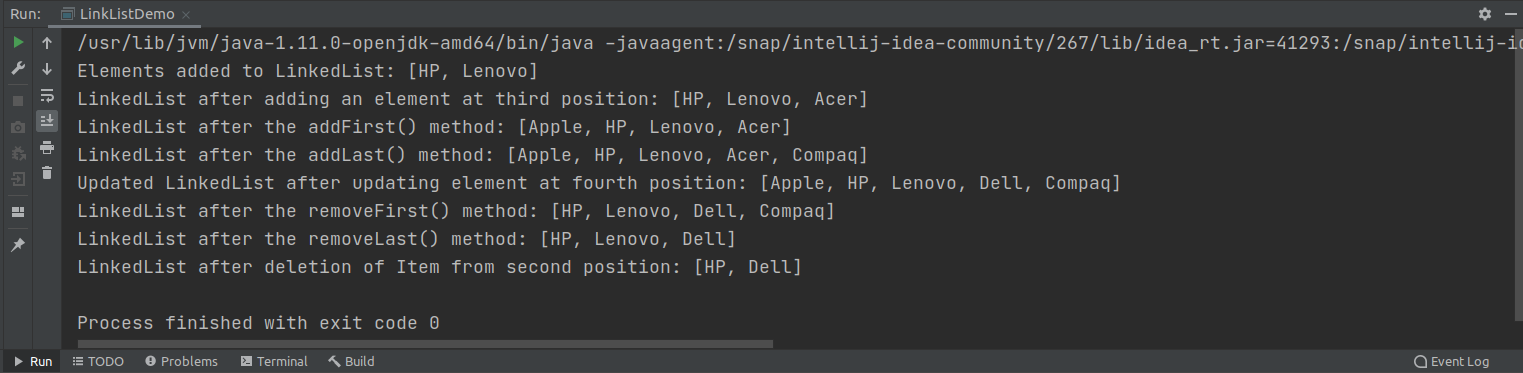
As you can see in the output the first and last elements and the element from the second position of the index is removed from LinkedList.
We can use an Iterator to iterate the elements of the LinkedList. The code to iterate the LinkedListelements is this.
Iterator<String> iterator=laptop.iterator();
while(iterator.hasNext()){
System.out.println("Updated LinkedList after iterating " + iterator.next()+" ");
}
Next re-run the program. You can see the iterated elements of the LinkedList.

Performing Operations on ArrayList
We use the ArrayList class for storing elements, without any size limit. We can add, access, update, and remove elements from an ArrayList whenever we want.
Let’s first start with adding elements to an ArrayList.
The code to create and add elements in an ArrayList using the add() method is this.
ArrayList<String> employee=new ArrayList<String>();
employee.add("Steve");
employee.add("Jack");
employee.add("Mark");
employee.add("John");
System.out.println("Elements added to ArrayList:" + employee);
The output on running the program is this.
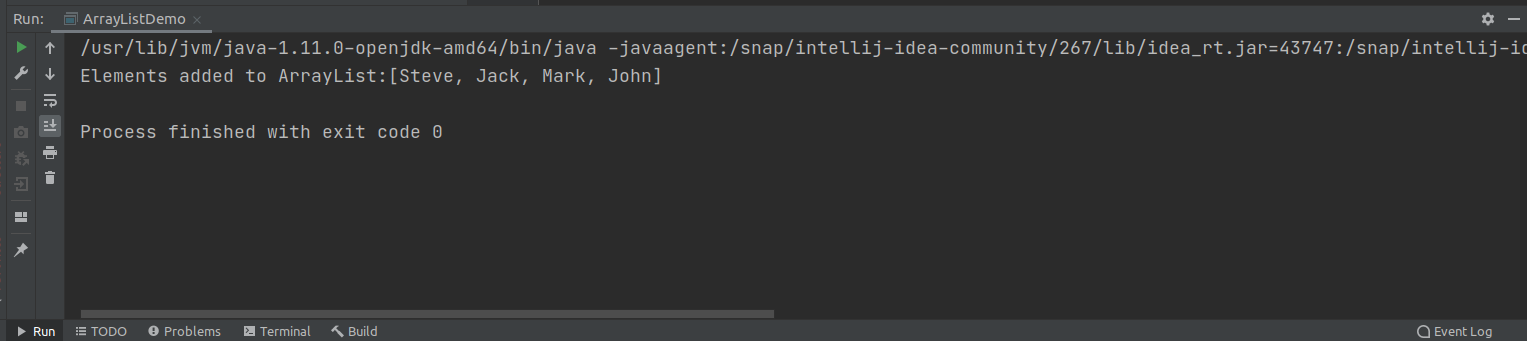
The output shows that the ArrayList is created and elements are added to it.
We can also add an element in a specified position of an ArrayList. The code to add an element in a specified position of the ArrayList is this.
employee.add(3, "Clark");
System.out.println("ArrayList after adding Clark at the fourth position: " + employee);
The output is this.

The output indicates that an element named Clark is added at the fourth position of the index.
We can access and change the elements of an ArrayList using the get() and set() methods. Since ArrayList is indexed, this method takes the index.
The set() method additionally takes in the element which needs to be updated at that index.
The code to access and update an element is this.
System.out.println("Accessing element from third position : "+employee.get(2));
employee.set(2, "Mathews");
System.out.println("ArrayList after updating element at the third position: " + employee);
The output is this.

The output shows the updated element at the third position of the index.
Next, we will perform the removal operation. In ArrayList, we can remove an element by its name or from a specified index position.
The code to remove elements from an ArrayList is this.
employee.remove(1);
employee.remove("John");
System.out.println("ArrayList after removing two elements: " + employee);
Now, re-run the program. You can see that the element of the second position in the index and John has been removed from the ArrayList.

Performing Operations on Stack
The Stack class is used to store the collection of objects. It is of the Last-In-First-Out (LIFO) type. This class allows different operations such as inserting, retrieving and removing.
We can use the push() method to add an element to the stack. This method adds an at the top of the Stack.
The code to create and add elements to a Stack is this.
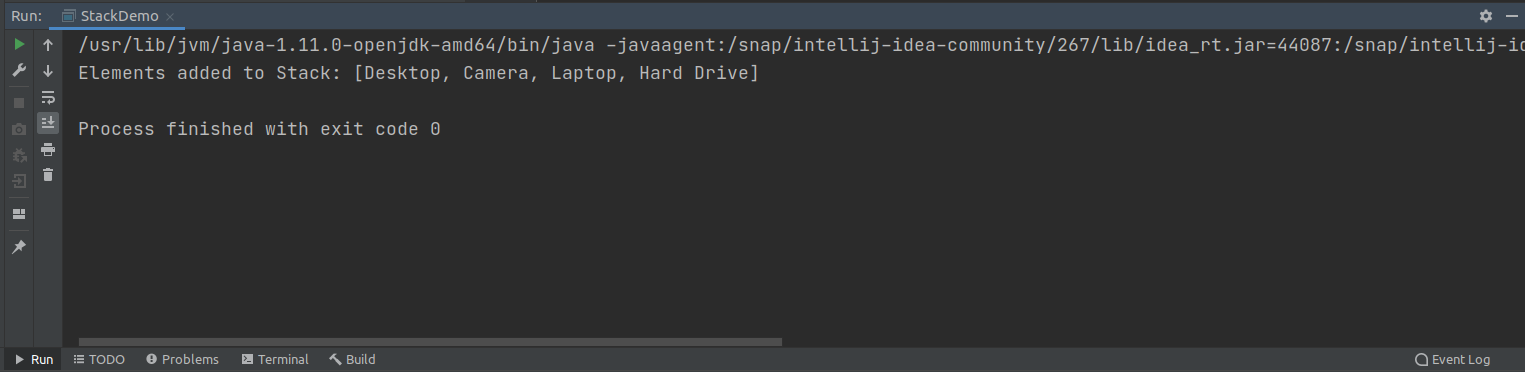
Stack product = new Stack();
product.push("Desktop");
product.push("Camera");
product.push("Laptop");
product.push("Hard Drive");
The output on running the program is this.
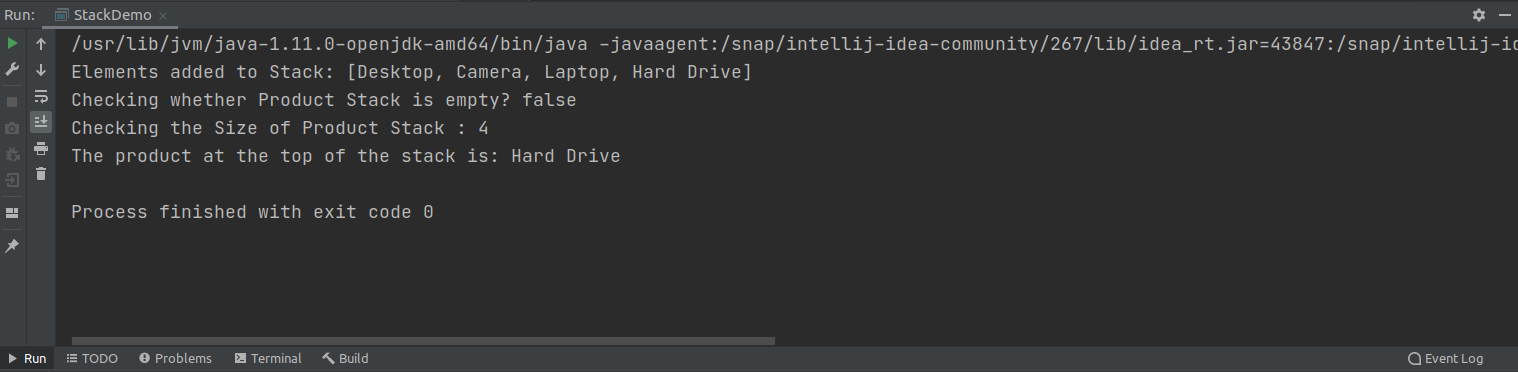
We can also retrieve an element present at the top of the Stack using the peak() method. The code to retrieve an element in a stack is this.
System.out.println("The product at the top of the" + " stack is: " + product.peek());The output on running the program is this.
To remove an element from the stack, we can use the pop() method. This method removes an element from the top of the Stack.
The code to remove an element from the stack is this.
System.out.println("Removed product is : " + product.pop());Finally, we can iterate through the stack and displays the elements within it. The code to iterate the Stack is this.
System.out.println("Iterated Stack after removing product is :" );
product.forEach(n ->
{
System.out.println(n);
});
The output of the program is this.
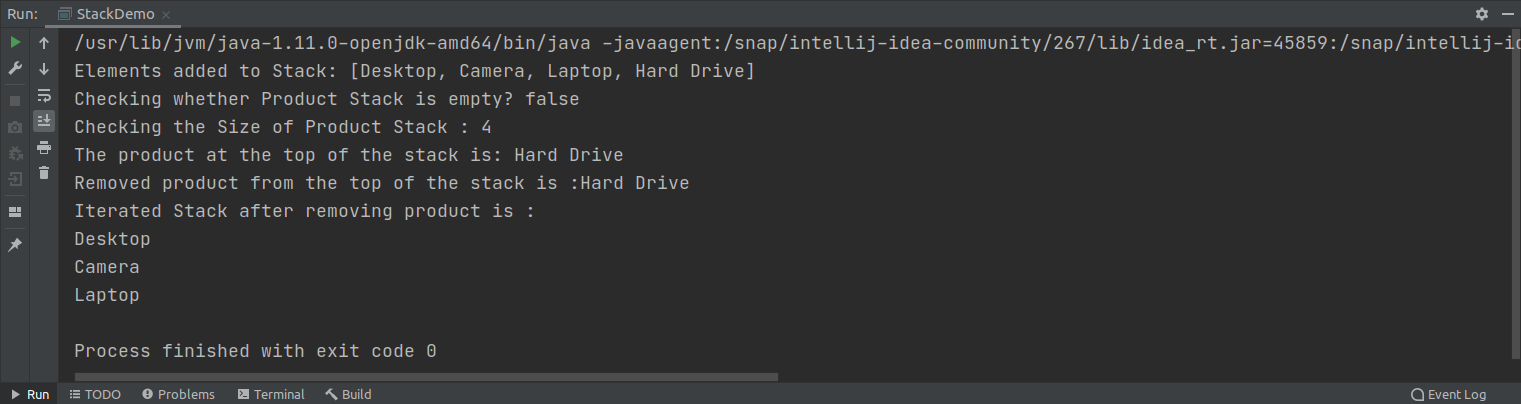
You can see that the iterated elements after removing elements from the Stack.
You can find the source code of this post on Github.