

Using RestTemplate with Apaches HttpClient
6 CommentsLast Updated on May 30, 2019 by jt
1. Introduction
In another blog post, we already looked at how we use the class RestTemplate to consume REST web services. In today’s blog post we will take a look at how we can use Apache HttpComponents as the HTTP client API for the RestTemplate.
RestTemplate and Apaches HTTP client API work at different levels of abstraction. RestTemplate is superior to the HTTP client and takes care of the transformation from JSON or XML to Java objects. The HTTP client, on the other hand, takes care of all low-level details of communication via HTTP.
In addition to Apache HttpComponents, other HTTP clients such as OkHttp or Netty can also be used in the RestTemplate substructure. The Spring Framework offers us the possibility to switch from the standard HTTP client (HttpURLConnection) to another HTTP client.
2. Downsides of the HttpURLConnection
Some probably wonder why you should swap the underlying HTTP client API. Especially for productive applications there are good reasons to exchange the HttpURLConnection as underlying HTTP client API because it has some disadvantages, which also affect the use of RestTemplate:
- With errors such as
400 Bad Requestor404 Not Foundan exception is thrown directly. This often forces us to work with try/catch to handle the exceptions accordingly. - Regarding credentials or connection pooling, other HTTP client APIs offer more configuration options and a wider range of functions.
- The HTTP method
PATCHis not supported.
Especially for applications in production, it is advisable to replace the standard HttpURLConnection with a proven HTTP client API like Apache when using RestTemplate.
3. Used Dependencies
To use RestTemplate and Apache HttpComponents as underlying HTTP client API, the following two dependencies are required:
<dependencies>
    <dependency>
        <groupId>org.springframework.boot</groupId>
        <artifactId>spring-boot-starter-web</artifactId>
    </dependency>
    <dependency>
        <groupId>org.apache.httpcomponents</groupId>
        <artifactId>httpclient</artifactId>
    </dependency>
</dependencies>
4. Configuration of Apache HttpComponents
As mentioned earlier, using an HTTP client API such as Apache HttpComponents allows us to add a number of additional configurations. The basic structure of our configuration class is as follows:
@Configuration
@EnableScheduling
public class ApacheHttpClientConfig {

  private final Logger LOG = LoggerFactory.getLogger(ApacheHttpClientConfig.class);

}
In this class, we will now create beans to configure the HTTP client. The whole source code can be found in our GitHub Repository.
4.1 Connection Pool
A connection pool ensures that already opened connections are reused. This means that connections don’t have to be re-established every time, saving us a lot of overhead and time. Especially the handshake procedure when establishing a connection consumes the most time in relation to the other.
The number of pooled connections can be defined in total, per route and for all routes of a certain host:
@Bean
public PoolingHttpClientConnectionManager poolingConnectionManager() {
  PoolingHttpClientConnectionManager poolingConnectionManager = new PoolingHttpClientConnectionManager();

  // set a total amount of connections across all HTTP routes
  poolingConnectionManager.setMaxTotal(MAX_TOTAL_CONNECTIONS);

  // set a maximum amount of connections for each HTTP route in pool
  poolingConnectionManager.setDefaultMaxPerRoute(MAX_ROUTE_CONNECTIONS);

  // increase the amounts of connections if the host is localhost
  HttpHost localhost = new HttpHost("http://localhost", 8080);
  poolingConnectionManager.setMaxPerRoute(new HttpRoute(localhost), MAX_LOCALHOST_CONNECTIONS);

  return poolingConnectionManager;
}
We will use this bean later when we build our HTTP client bean from our configuration beans.
4.2 Connection Keep-Alive Strategy
A connection Keep-Alive strategy determines how long a connection may remain unused in the pool until it is closed. This ensures that connections that are no longer needed are closed again promptly.
We also define a bean for this purpose:
@Bean
public ConnectionKeepAliveStrategy connectionKeepAliveStrategy() {
  return (httpResponse, httpContext) -> {
    HeaderIterator headerIterator = httpResponse.headerIterator(HTTP.CONN_KEEP_ALIVE);
    HeaderElementIterator elementIterator = new BasicHeaderElementIterator(headerIterator);

    while (elementIterator.hasNext()) {
      HeaderElement element = elementIterator.nextElement();
      String param = element.getName();
      String value = element.getValue();
      if (value != null && param.equalsIgnoreCase("timeout")) {
        return Long.parseLong(value) * 1000; // convert to ms
      }
    }

    return DEFAULT_KEEP_ALIVE_TIME;
  };
}
The bean implements the following behavior: If the server does not send a Keep-Alive header in the response, the connections are kept alive for 20 seconds by default.
This implementation is a workaround to bypass the Apache Keep-Alive strategy. Apaches strategy assumes that connections should remain alive indefinitely if the server does not send a Keep-Alive header. This standard behavior is now explicitly circumvented by our implementation.
4.3 IDLE Connection Monitor
Furthermore, we want to configure a connection monitor that runs every 20 seconds and closes outdated connections as well as long waiting connections:
@Bean
public Runnable idleConnectionMonitor(PoolingHttpClientConnectionManager pool) {
  return new Runnable() {
    @Override
    @Scheduled(fixedDelay = 20000)
    public void run() {
      // only if connection pool is initialised
      if (pool != null) {
        pool.closeExpiredConnections();
        pool.closeIdleConnections(IDLE_CONNECTION_WAIT_TIME, TimeUnit.MILLISECONDS);
      }
    }
  };
}
Since we work with the annotation @Scheduled here, our class must be annotated with @EnableScheduling. This activates Spring support for automatic task execution. Without @EnableScheduling our task cannot be executed at runtime.
We also need our own thread pool to schedule and execute tasks automatically. For this, we use Springs ThreadPoolTaskScheduler, which internally uses a ScheduledThreadPoolExecutor. We configure this with the following bean:
@Bean
public TaskScheduler taskScheduler() {
  ThreadPoolTaskScheduler scheduler = new ThreadPoolTaskScheduler();
  scheduler.setThreadNamePrefix("idleMonitor");
  scheduler.setPoolSize(5);
  return scheduler;
}
4.4 HttpClient Bean
Before we build our HTTP client, we define the following timeouts via RequestConfig class:
- Connect Timeout: Maximum time that is waited for a connection to be established.
- Connection Request Timeout: Maximum time that is waited until a connection from the connection pool is available.
- Socket Timeout: Maximum time that is waited until data is received when a connection is established.
Then we can use the connection pool and the keep-alive strategy bean to build our HTT client bean:
@Bean
public CloseableHttpClient httpClient() {
  RequestConfig requestConfig = RequestConfig.custom()
          .setConnectTimeout(CONNECT_TIMEOUT)
          .setConnectionRequestTimeout(REQUEST_TIMEOUT)
          .setSocketTimeout(SOCKET_TIMEOUT)
          .build();


  return HttpClients.custom()
          .setDefaultRequestConfig(requestConfig)
          .setConnectionManager(poolingConnectionManager())
          .setKeepAliveStrategy(connectionKeepAliveStrategy())
          .build();
}
Now we have finished configuring our HTTP client. In the next step, we will connect the HTTP client with the RestTemplate so that it uses our HTTP client for all HTTP calls.
5. Configuration of RestTemplate
The Wiring of the HTTP client with the RestTemplate is done in a new config class. The basic structure of the RestTemplateConfig class is as follows:
@Configuration
public class RestTemplateConfig {

  final CloseableHttpClient httpClient;

  @Autowired
  public RestTemplateConfig(CloseableHttpClient httpClient) {
    this.httpClient = httpClient;
  }

}
Via the constructor, we injected our just configured HTTP client so that we can wire it here with the RestTemplate.
5.1 HTTP Request Factory
First, we define a bean of type HttpComponentsClientHttpRequestFactory. This factory internally uses Apache HttpComponents to generate HTTP requests. We link this bean to the Apache HTTP client that we injected before through our constructor:
@Bean
public HttpComponentsClientHttpRequestFactory clientHttpRequestFactory() {
  HttpComponentsClientHttpRequestFactory clientHttpRequestFactory = new HttpComponentsClientHttpRequestFactory();

  clientHttpRequestFactory.setHttpClient(httpClient);
  return clientHttpRequestFactory;
}
5.2 Custom Error Handler
Without an own error handler, a default error handler would be used, which punishes us with an exception for an ordinary client error like 404 Not Found or 400 Bad Request. This, in turn, forces us to wrap every HTTP request into a try/catch block, which quickly inflates the code and makes it unclear, since we have to handle the error in the middle of the business logic. Much more elegant at this point is the use of an own error handler, which can be implemented as follows:
public class CustomClientErrorHandler implements ResponseErrorHandler {

  private final Logger LOG = LoggerFactory.getLogger(CustomClientErrorHandler.class);

  @Override
  public boolean hasError(ClientHttpResponse clientHttpResponse) throws IOException {
    return clientHttpResponse.getStatusCode().is4xxClientError();
  }

  @Override
  public void handleError(ClientHttpResponse clientHttpResponse) throws IOException {
    LOG.error("HTTP Status Code: " + clientHttpResponse.getStatusCode().value());
  }
}
The error handler is very simple and makes sure that all 4xx errors are logged and no exceptions are thrown anymore.
5.3 HTTP Request Interceptor
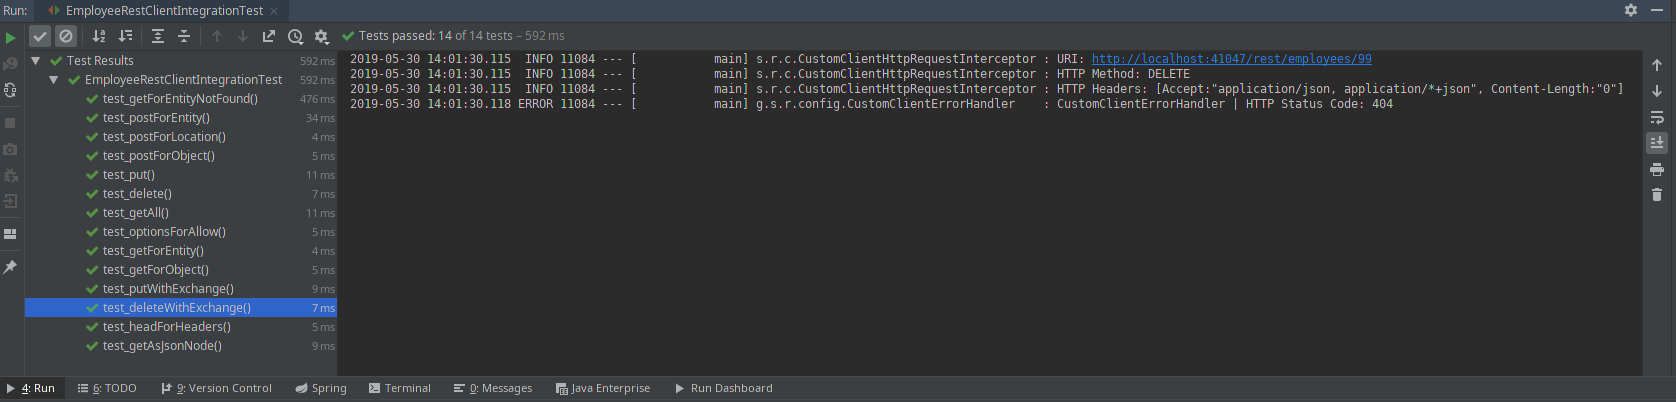
An HTTP request interceptor intercepts each HTTP request and allows the execution of additional code. This makes an interceptor excellent for logging every HTTP request that is sent. This can be very helpful for debugging.
For the implementation of an Interceptor, only the interface ClientHttpRequestInterceptor has to be implemented. The interface declares the method intercept(HttpRequest request, byte[] body, ClientHttpRequestExecution execution). This gives us complete access to the HTTP request including the body:
public class CustomClientHttpRequestInterceptor implements ClientHttpRequestInterceptor {

  private Logger LOG = LoggerFactory.getLogger(CustomClientHttpRequestInterceptor.class);

  @Override
  public ClientHttpResponse intercept(HttpRequest request, byte[] body, ClientHttpRequestExecution execution) throws IOException {

    // log the http request
    LOG.info("URI: {}", request.getURI());
    LOG.info("HTTP Method: {}", request.getMethodValue());
    LOG.info("HTTP Headers: {}", request.getHeaders());

    return execution.execute(request, bytes);
  }
}
All HTTP requests are then logged to the console:
5.4 Create RestTemplate Bean
Finally, we configure our RestTemplate Bean:
@Bean
public RestTemplate restTemplate() {
  return new RestTemplateBuilder()
          .requestFactory(this::clientHttpRequestFactory)
          .errorHandler(new CustomClientErrorHandler())
          .interceptors(new CustomClientHttpRequestInterceptor())
          .build();
}
To configure RestTemplate we can use the handy RestTemplateBuilder. With the builder, we wire the clientHttpRequestFactory bean as well as our own error handler and our interceptor. That’s it – that’s all we have to do to work with our specially configured RestTemplate.
6. Summary
In this blog post, we have looked at how we can easily replace the HTTP client API used by Springs RestTemplate with another one. We looked at the following configuration options:
- Configuration of a connection pool, which makes it possible to reuse existing connections.
- Configuration of your own keep-alive strategy.
- Creating an Idle Connection Monitor to remove connections that are no longer needed.
- Create and use your own error handler.
- Logging of all HTTP requests with our own interceptor.
- Wiring of Apaches HTTP client API with Springs
RestTemplate.
Also, like to check out the project repository at GitHub. There you’ll also find a working example that uses our self-configured RestTemplate.


Nital Chandel
Excellent article Daniel !
Dexter
Is there anyway to pass the request a value for a specific header?
Jaywal
What version of java do you use? I am getting compile errors for httpCLient in
@Autowired
public RestTemplateConfig(CloseableHttpClient httpClient) {
this.httpClient = httpClient;
}
and clientHttpRequestFactory in
@Bean
public RestTemplate restTemplate() {
return new RestTemplateBuilder()
.requestFactory(this::clientHttpRequestFactory)
.errorHandler(new XapiErrorHandler())
.build();
}
zhuguowei
Could ignore RestTemplateConfig? It seems not used it?
And it seems if want to replace the default implementation, you should consider many details, maybe more error prone
Deep Singhal
HI Daniel
I am a subscriber to your course on Spring boot and really liking it. I have a question on this article. Why do we need idleConnectionMonitor to close idle connections from pool, if we have already defined ConnectionKeepLive strategy. Will not the strategy closes the connection itself after 20 s in case if no response header or X number of secs in case of response? Waiting for your response. Thank You
Venkat
Hi Daniel,
I just downloaded apache’s Http Client 5. Our application was using RestTemplate with httpclient 4. Now with http client 5, can we continue to use RestTemplate as we are still using spring 5.3?