Internationalization with Spring Boot
0 CommentsInternationalization or I18N is a process that makes your application adaptable to different languages and regions without engineering changes on the source code. You can display messages, currencies, date, time etc. according to the specific region or language, likewise you can say internationalization is a readiness of localization.
Maven dependency
You will only require the basic spring boot dependencies along with lombok dependency in your pom.xml.
<dependency>
    <groupId>org.projectlombok</groupId>
    <artifactId>lombok</artifactId>
    <optional>true</optional>
</dependency>
You will also require thymeleaf dependency to be added in as a front-end templating engine.
Note: In our example, we are only testing the internationalization with Postman and hence, we do not require to add thymeleaf dependency.
Spring Boot Internationalization Example
It is a simple application to greet a user in different languages.
Internationalization requires you to define the locale configuration in a configuration class.
This is the code for LocaleConfig class.
LocaleConfig.java
package guru.springframework.configuration;

import org.springframework.context.annotation.Bean;
import org.springframework.context.annotation.Configuration;
import org.springframework.context.support.ResourceBundleMessageSource;
import org.springframework.web.servlet.i18n.AcceptHeaderLocaleResolver;
import java.util.Locale;

@Configuration
public class LocaleConfig {

    @Bean
    public AcceptHeaderLocaleResolver localeResolver() {
        final AcceptHeaderLocaleResolver resolver = new AcceptHeaderLocaleResolver();
        resolver.setDefaultLocale(Locale.US);
        return resolver;
    }

    @Bean
    public ResourceBundleMessageSource messageSource() {
        final ResourceBundleMessageSource source = new ResourceBundleMessageSource();
        source.setBasename("internationalization/lang");
        return source;
    }
}
To determine which locale is currently being used by the application, we need to add a LocaleResolver bean.
The LocaleResolver interface has implementations that determine the current locale based on the session, cookies, the Accept-Language header, or a fixed value.
In our example, we have used the AcceptHeaderLocaleResolver to retrieve locale based on the Accept-Language passed as a parameter.
I have set a default locale with the value US.
The ResourceBundleMessageSource bean in Line 20 is used here to resolve text messages from properties file based on different locales.
You will now require a controller class to accept the incoming request and return a response to the user.
The code for the GreetingsController class is this.
GreetingsController.java
package guru.springframework.controller;

import lombok.extern.slf4j.Slf4j;
import org.springframework.beans.factory.annotation.Autowired;
import org.springframework.beans.factory.annotation.Value;
import org.springframework.context.support.ResourceBundleMessageSource;
import org.springframework.web.bind.annotation.*;

import java.util.Locale;

@Slf4j
@RestController
@RequestMapping("/api")
public class GreetingsController {

    @Autowired
    private ResourceBundleMessageSource source;
    @Value("${placeholder.greetings}")
    private String greetings;

    @GetMapping("/message")
    public String getLocaleMessage(
            @RequestHeader(name = "Accept-Language", required = false) final Locale locale,
            @RequestParam(name = "username", defaultValue = "Albert Xin", required = false) final String username) {

        log.info("Returning greetings for locale = {}", locale);
        return source.getMessage(greetings, new Object[]{username}, locale);
    }
}
Here, we have just defined a simple get method which accepts Accept-Language as a RequestHeader parameter and username as the query parameter.
In Line 26, we have added a log message to display the locale chosen in the console.
Defining the Message Sources
Spring Boot application by default takes the message sources from src/main/resources folder under the classpath. The default locale message file name should be message.properties and files for each locale should name as messages_XX.properties. The “XX” represents the locale code.
The message properties are in key pair values. If any properties are not found on the locale, the application uses the default property from messages.properties file.
application.yml
placeholder:
  greetings: welcome.message
server:
  port: 8080
spring:
  application:
    name: internationalization-with-springboot
Here, I have defined the spring configuration and a placeholder key for internationalization.
message.properties
welcome.message=Greetings {0}
In English, the value of the key is specified here.
message_fr.properties
welcome.message=Bonjour {0}
Hello in French translates to Bonjour.
message_de.properties
welcome.message=Hallo {0}
Hello translates to Hallo in German.
Build and Run the Application
Execute the Main Application.
After that, open the Postman tool to hit the application endpoints to persist the data into the database or fetch from it.
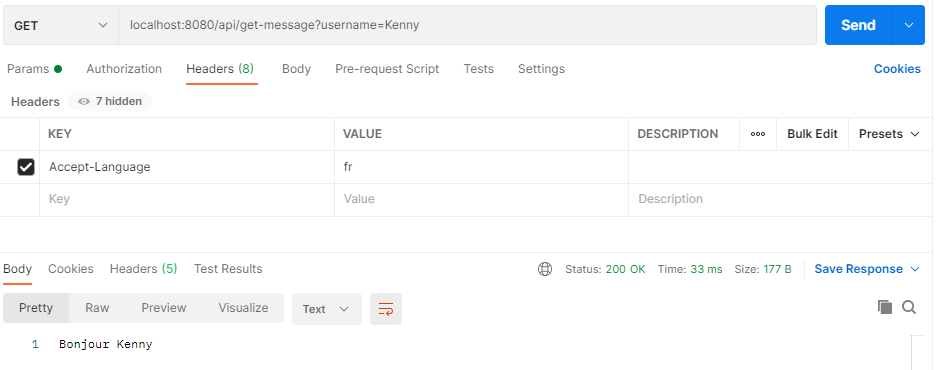
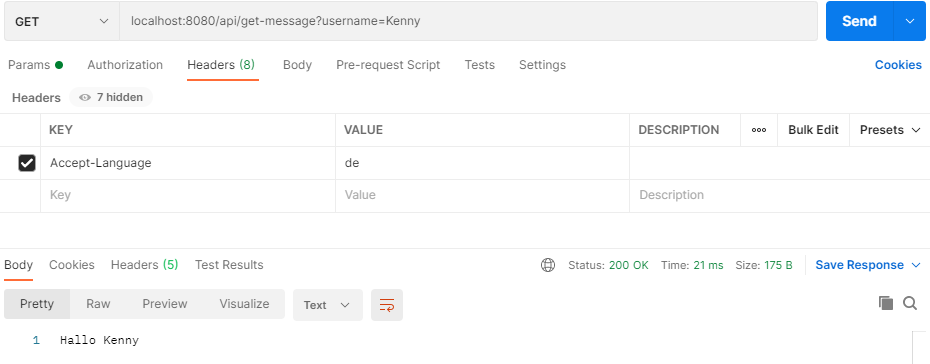
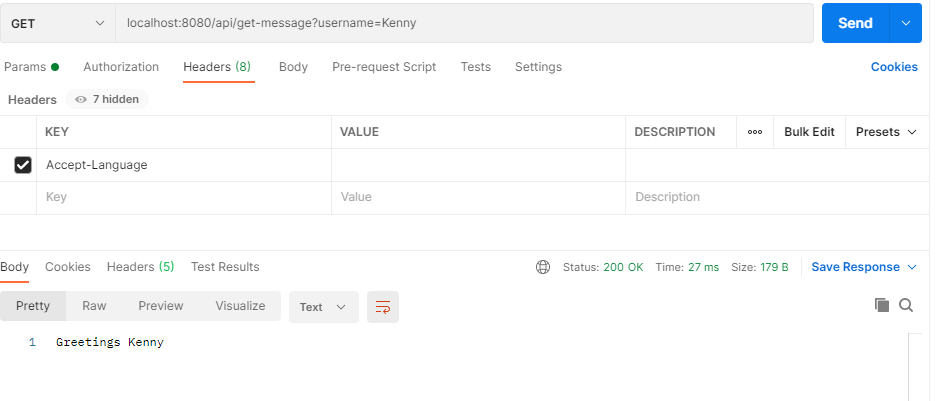
Here, each incoming request contains the Accept-Language header, where we will specify the locale. Based on this locale, the appropriate message will be returned to the user.
The header value is set to fr. As a result, the message will be displayed in the French language.
Here, I have sent the Accept-Language header value as de and the message will be displayed in the german language.
And, when you do not specify any language, the output is this.
This is the console output.
Summary
In this post, we covered integrating Internationalization with a Spring Boot Project. That is to say, performing simple translations using MessageSource implementations and LocaleResolver,using the details of incoming HTTP requests is a very simple task now. Internationalization helps us to make our web applications reach as wide an audience as possible. Consequently, it can be adapted and localized to different cultures, regions, and languages. On the other hand, Localization is the adaptation of any software or mobile application product to meet the language, culture, and other requirements of each locale.
You can find the source code of this post on Github.


