
How to Use Docker Hub for Spring Boot
1 CommentLast Updated on October 21, 2024 by jt
In the previous post of the Spring Boot on Docker series, I discussed how to create and run a Docker image of a Spring Boot application. Once you create your image, you would want to share it with your team members or other stakeholders. For that, you can use Docker Hub – a centralized repository of Docker images.
You can search and download Docker images that are built by other communities in Docker Hub. You can also upload and share your own images publicly or privately within your team.
In this post, I’ll discuss the steps to manage Spring Boot applications on Docker Hub.
Push a Spring Boot Image to Docker Hub
In order to push a Spring Boot image to Docker Hub.
1. Create an account on Docker Hub.
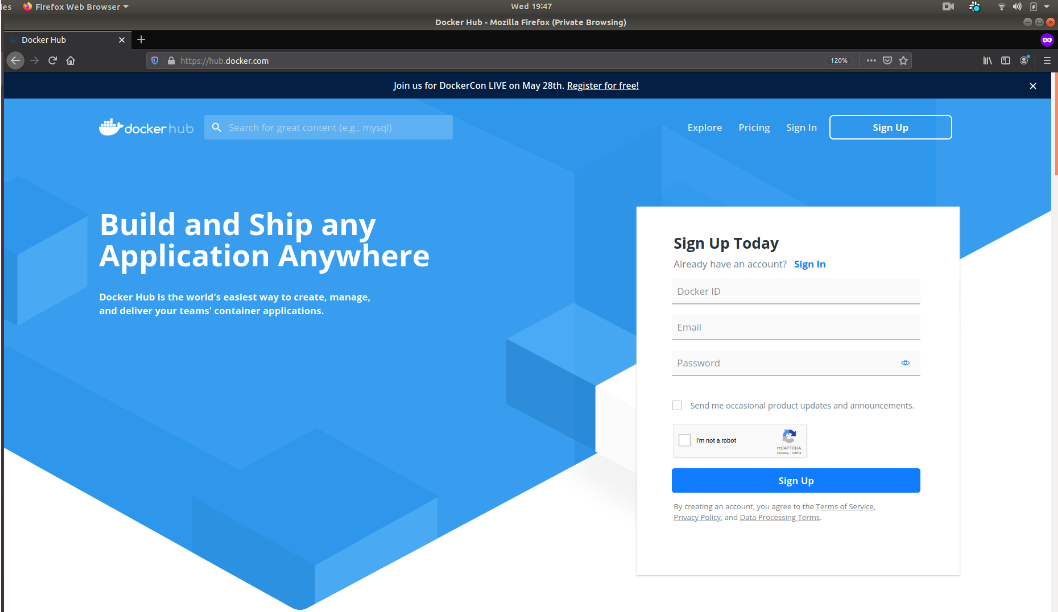
2. Once the account is created, sign in to your account.
3. Open the terminal and login with the docker login command.
$ docker login --username=<username>
Enter your password when prompted.
4. Find the ID of the image you want to push.
$ docker images

5. Tag the image with the docker tag command. The notation for the repository on Docker Hub is username/<image-name>:tag.
$ docker tag <image_id> username/<image-name>:tag
For example, the image ID of the Spring Boot application is 4713ce8269b9. So I’ll tag the image like this.
$ docker tag 4713ce8269b9 myusername/springboot-docker:latest
6. Run docker push to push the tagged image to Docker Hub.
$ docker push myusername/springboot-docker:latest
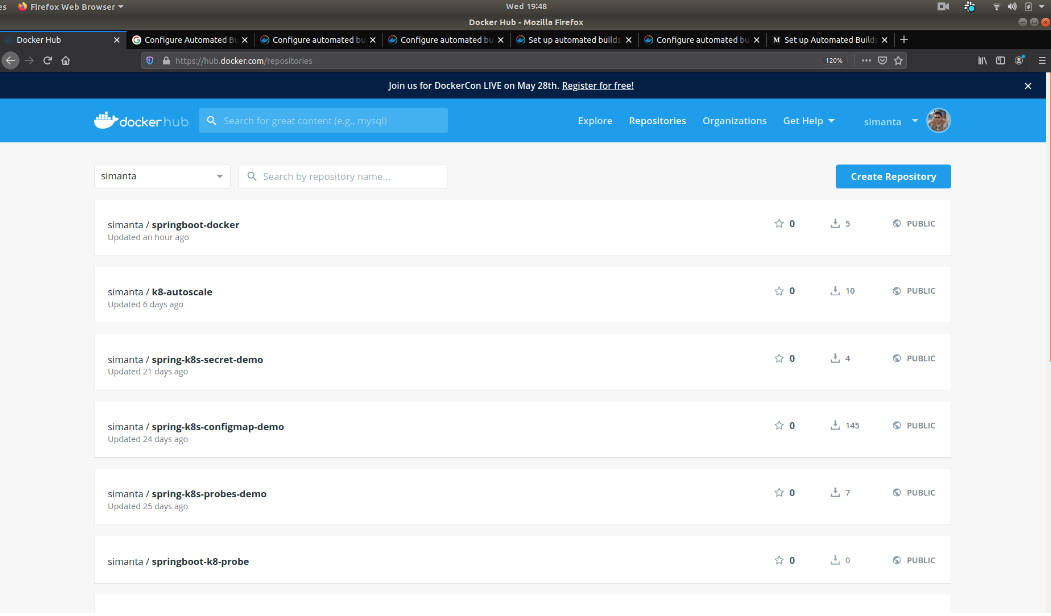
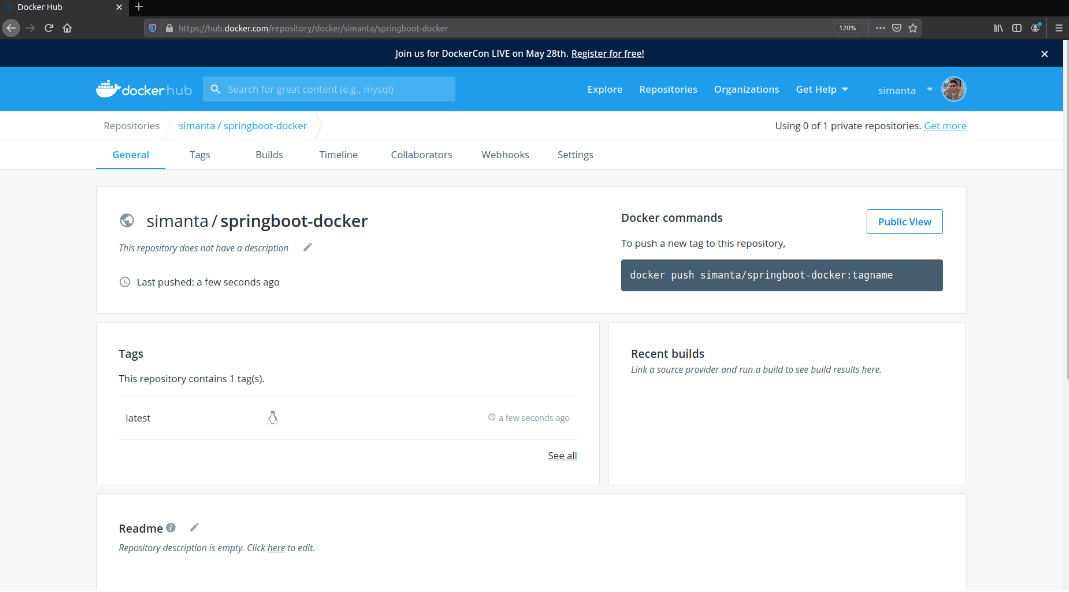
7. You can see the published springboot-docker image.
Configure Automated Builds
You might want to automatically build your images, whenever you push changes to your VCS. Docker Hub can automatically build images from source code in an external repository, such as GitHub and BitBucket.
Setting Up the Project
I initially had some trouble setting up the build environment on Docker Hub. This is because the environment, unlike my local environment, doesn’t have the required tools to build and package Spring Boot applications. One example is that the environment doesn’t have Maven. So I used Maven Wrapper.
The easiest way to set up the Maven Wrapper for your project is to use the Takari Maven Plugin. This plugin comes with the wrapper goal to add or update all the necessary Maven Wrapper files.
To add Maven Wrapper to your project execute this command.
mvn -N io.takari:maven:0.7.7:wrapper
Spring Boot 2.3.0 and higher brings in support for Spring Boot Docker Layers. Spring Boot Docker Layers allows separating dependencies and class files into separate layers which helps in the re-use of dependency layers.
I have one complete post on it – Why You Should be Using Spring Boot Docker Layers. I suggest you go through this post to know more about Spring Boot Docker layers.
We can enable the packaging of layers in the Maven build process. For this, I’ll add configuration to spring-boot-maven-plugin plugin to enable layers in pom.xml.
pom.xml
<plugin>
   <groupId>org.springframework.boot</groupId>
   <artifactId>spring-boot-maven-plugin</artifactId>
   <configuration>
        <layers>
           <enabled>true</enabled>
           <includeLayerTools>true</includeLayerTools>
        </layers>
   </configuration>
</plugin>
Next, I updated my Dockerfile like this.
Dockerfile
FROM openjdk:11 as builder
WORKDIR application
COPY ./pom.xml ./pom.xml
COPY mvnw .
COPY .mvn .mvn
COPY ./src ./src
RUN ["chmod", "+x", "mvnw"]
RUN ./mvnw dependency:go-offline -B
RUN ./mvnw clean package && cp target/publish-docker-image-to-docker-hub-1.0-SNAPSHOT.jar publish-docker-image-to-docker-hub-1.0-SNAPSHOT.jar
RUN java -Djarmode=layertools -jar publish-docker-image-to-docker-hub-1.0-SNAPSHOT.jar extract
#ENTRYPOINT ["java","-jar", "publish-docker-image-to-docker-hub-1.0-SNAPSHOT.jar"]

FROM openjdk:11-jre-slim
WORKDIR application
COPY --from=builder application/dependencies/ ./
COPY --from=builder application/spring-boot-loader/ ./
COPY --from=builder application/snapshot-dependencies/ ./
COPY --from=builder application/application/ ./
ENTRYPOINT ["java", "org.springframework.boot.loader.JarLauncher"]
I have used a multi-stage Docker build.
In the Dockerfile:
- Line 03 – Line 04 copies the
pom.xmlfile and themvnwMaven Wrapper file, from the local filesystem to the filesystem of Docker. - Line 05 – Line 06 copies the
.mvnwthat contains the Maven Wrapper JAR and thesrcfolder to the Docker filesystem. - Then, Line 07 makes the
.mvnwfile executable. - Next, Line 08 runs the
dependency:go-offlinegoal that resolves all project dependencies, including plugins and reports and their dependencies. - Line 9 packages the application into a Spring Boot JAR and copies it to the Docker filesystem.
- Line 10 runs the Spring Boot JAR file.
Then starts the second stage of the Spring Boot Docker image.
- Line 13 pulls the OpenJDK Java 11 JRE Slim image.
- Line 15 – Line 18 copies each layer directory into the image.
- Finally, Line 19 sets the entry point for our Spring Boot image.
Configuring Builds on Docker Hub
In order to configure automated builds:
1. Click on the
springboot-dockerrepository to view the repository details.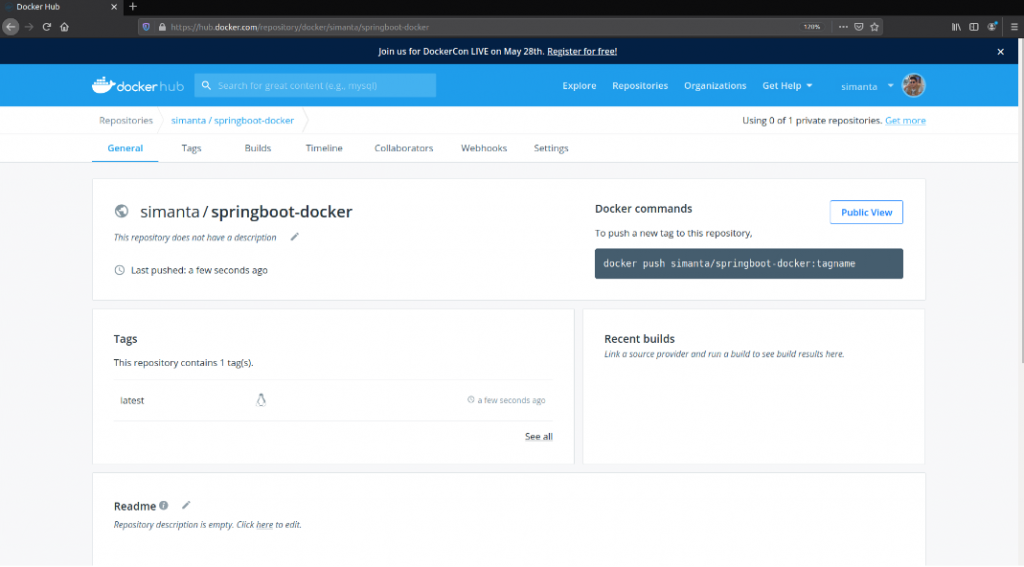

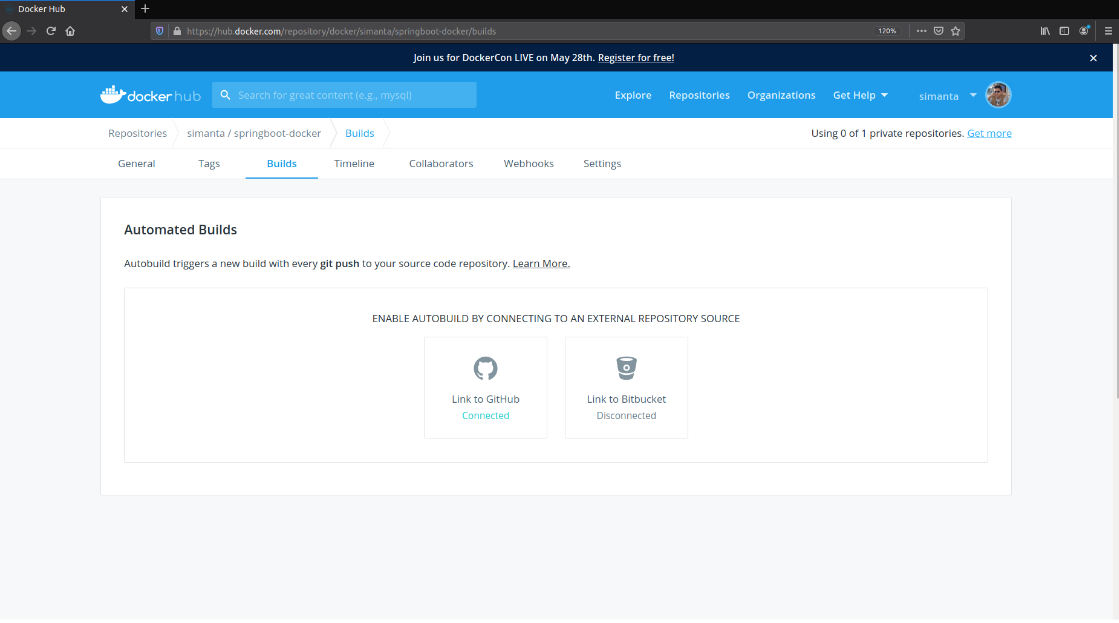
2. Click on the
Buildstab.

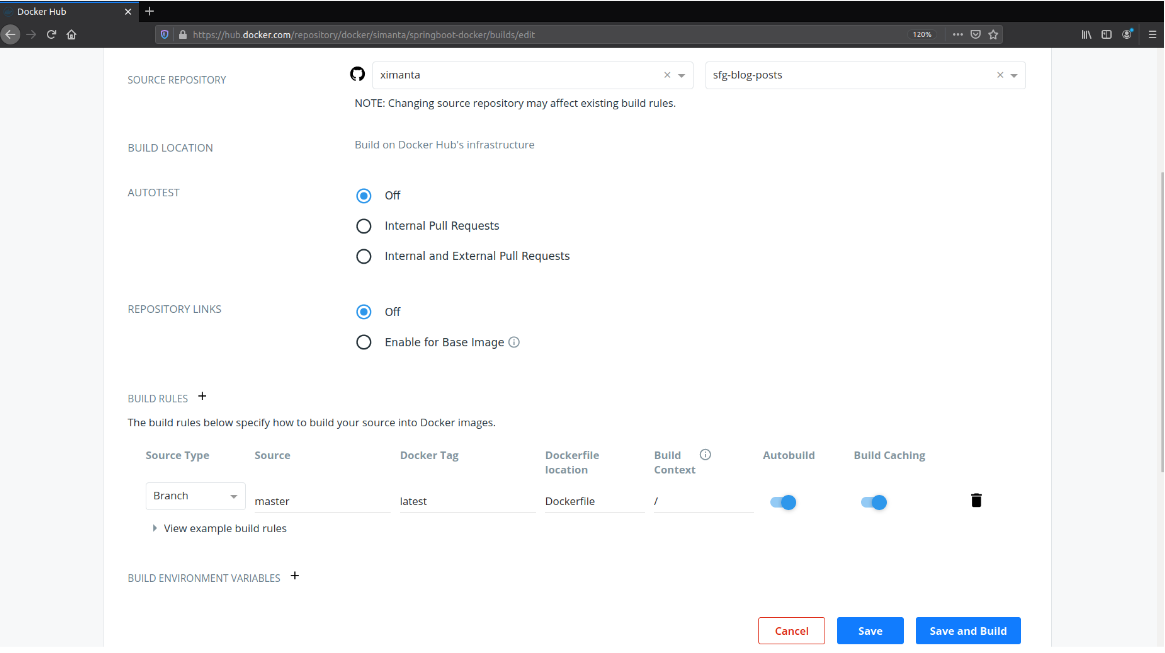
3. Select the external repository source where the image source code is stored. You will be redirected to the view to link the code repository.
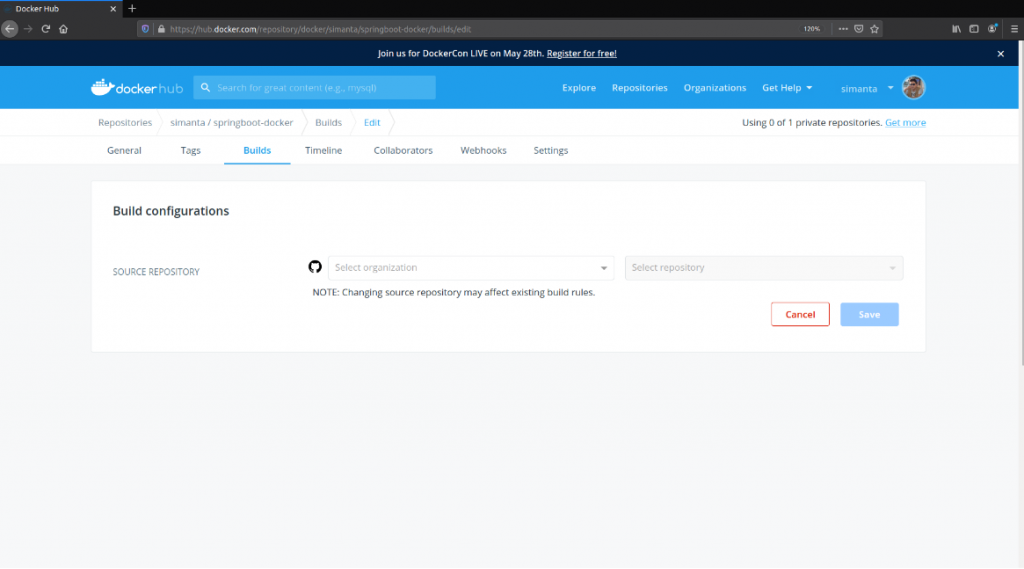

4. Specify the user and select the source repository to build an image.
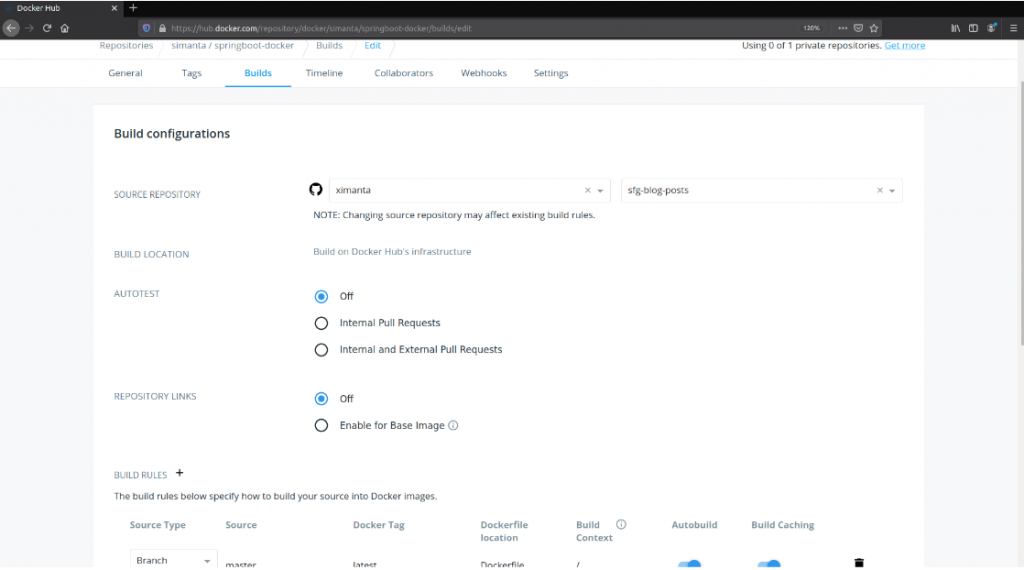
5. Review the
Build Rules. A default Build Rule is already set up which sets build from themasterbranch and creates a Docker image with thelatesttag.

6. Click on
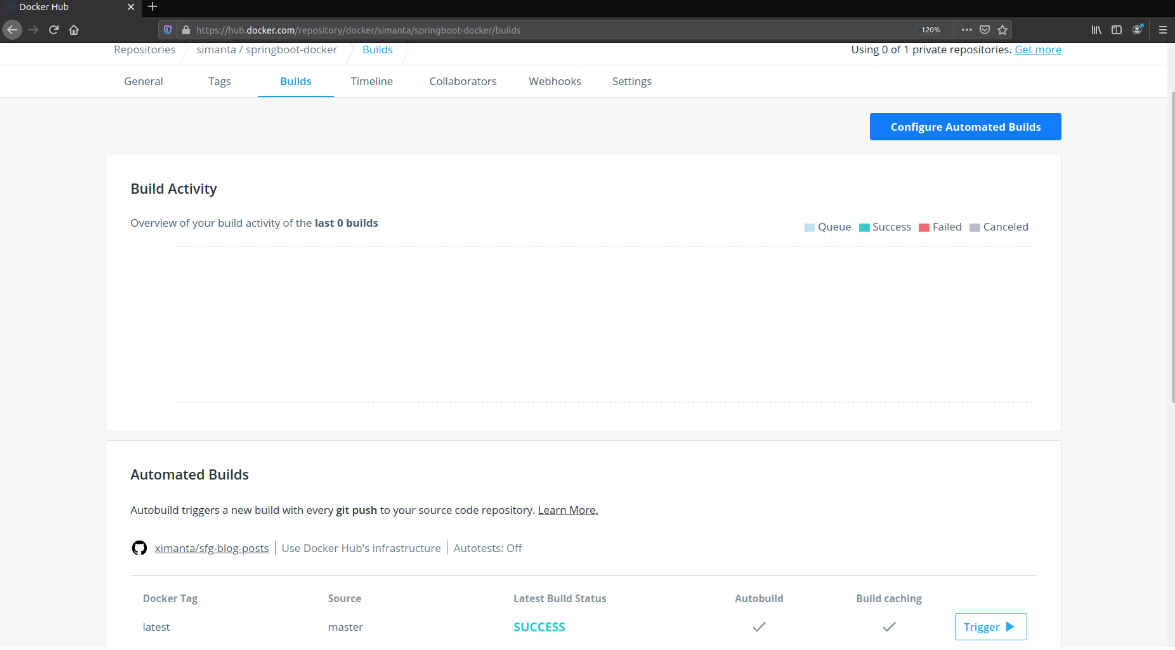
Saveto save the configuration settings. With this, a webhook is added to your source repository to notify Docker Hub whenever you push changes to your VCS. You can see a summary of your builds fromLatest Build Statusunder theAutomated Buildssection.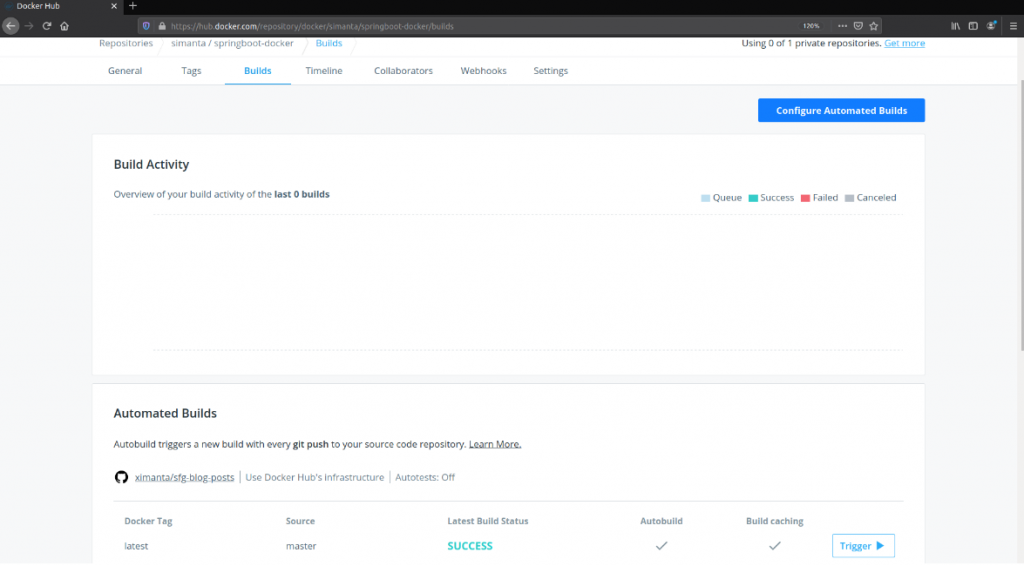

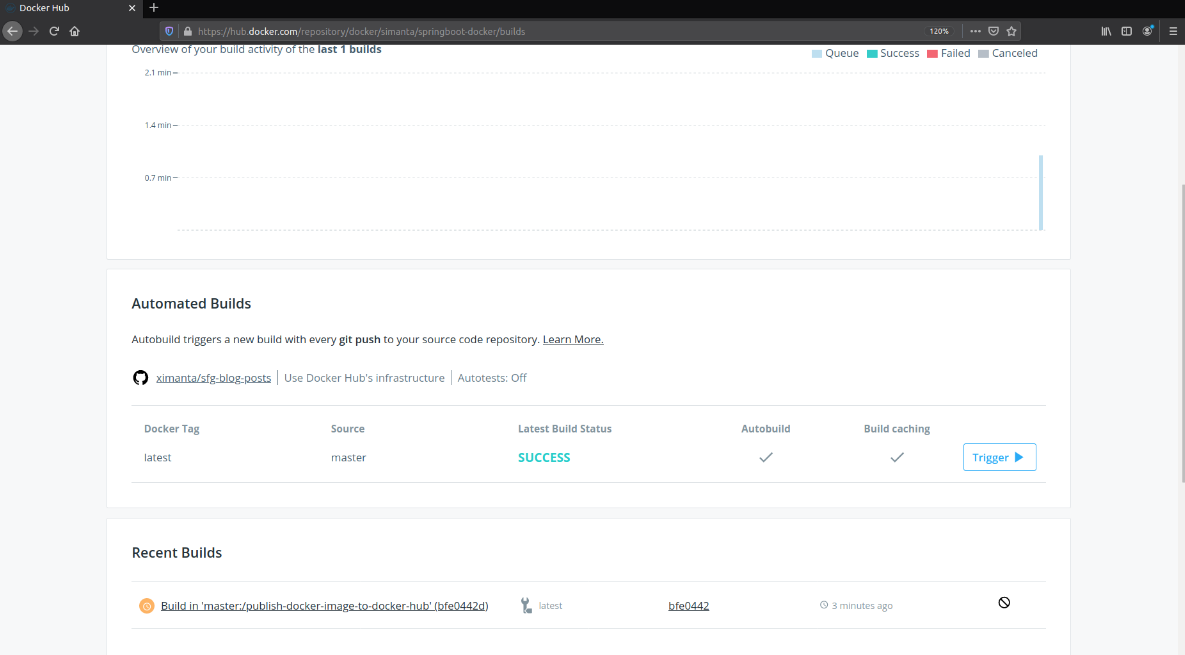
7. Make changes to your source code and push to your GitHub repository.
8. Check the Build status under the
Recent Buildssection in theBuildstab.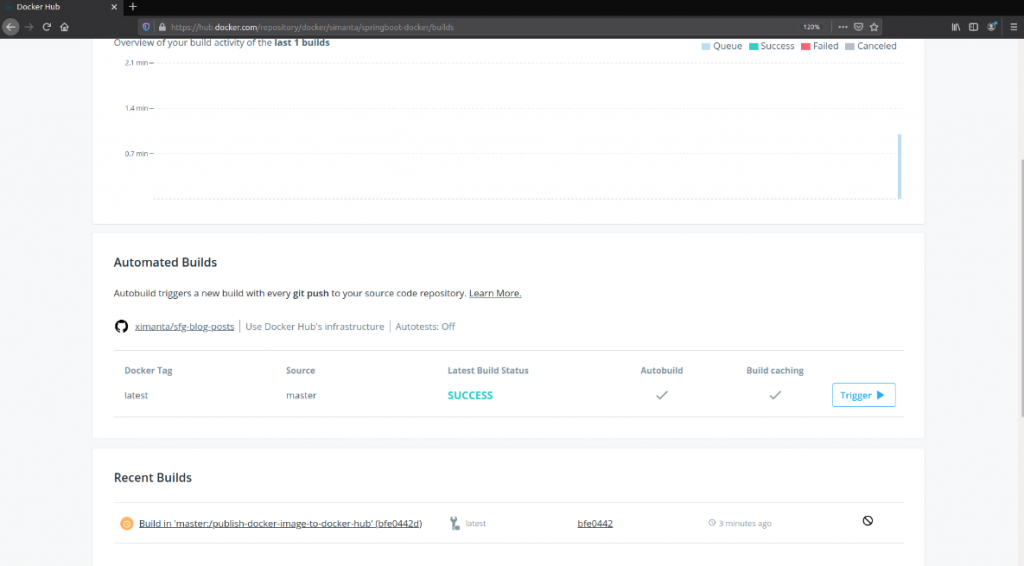
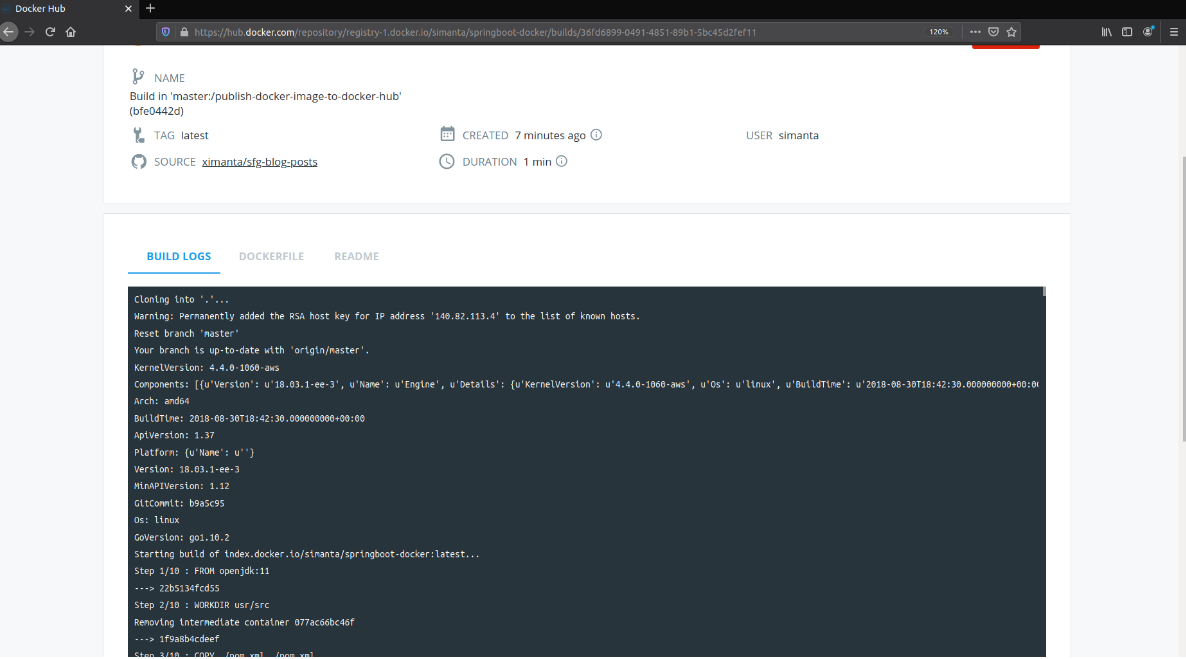
9. Click on the Build Job to view the Build report. The report shows information about the build job.
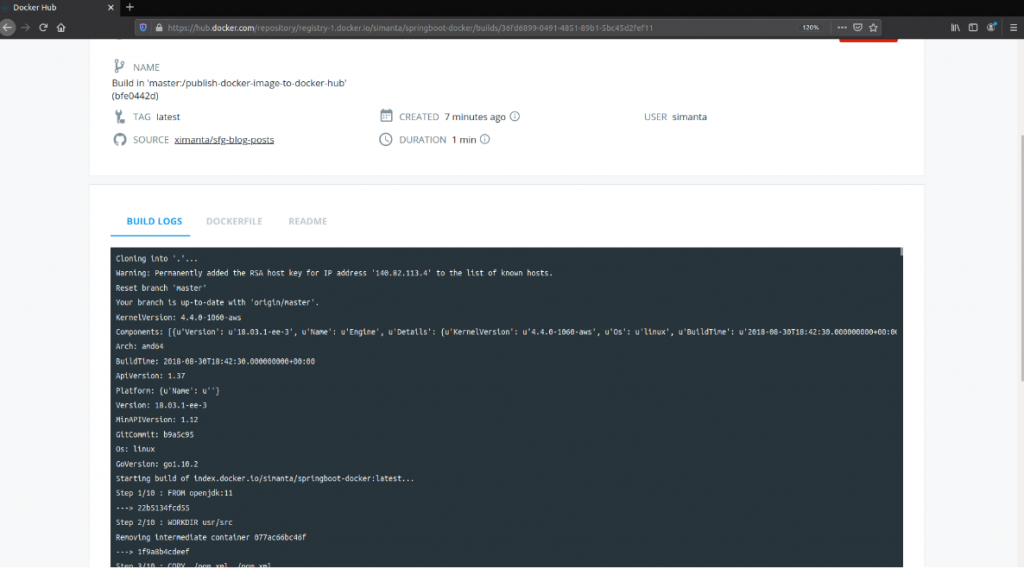
Once the build is completed, the
Latest Build Statuswill change toSUCCESS.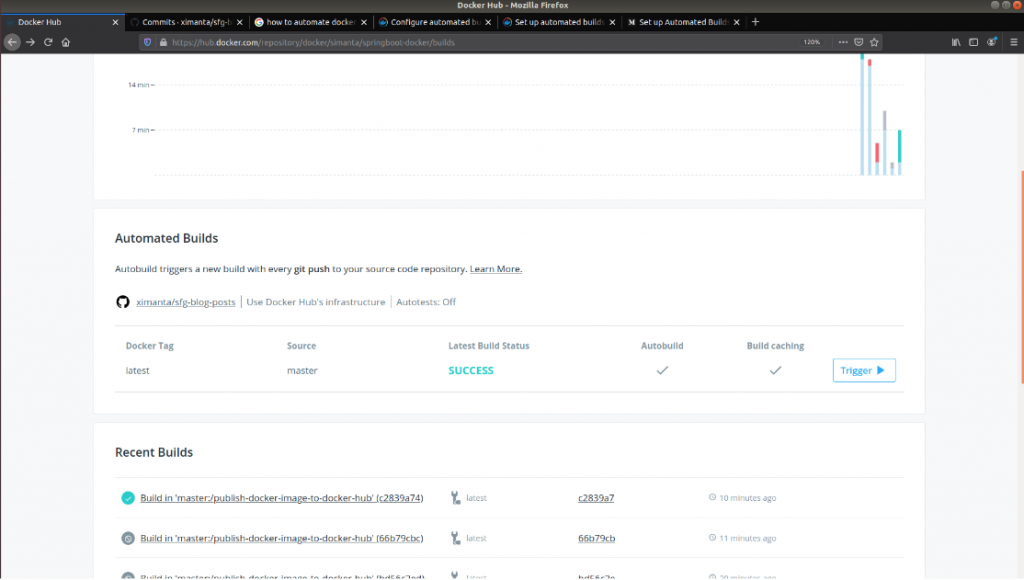

Summary
Automated Build is a powerful feature in Docker Hub to implement Continuous Integration/Continuous Deployment (CI/CD) pipeline into your codebase with very little effort.
The Pro and Team versions of Docker Hub comes with more advanced supports, such as parallel builds, team collaboration and management tools, role-based access controls, and unlimited private repos.
Webhooks are another great feature that you can use. Webhooks are POST requests sent to a URL you define in Docker Hub. This allows you to cause an action in another service in response to a push event in the repository.
The source code for this post can be found here on GitHub.
To learn how to use Docker to supercharge your Enterprise Java Development, check the Udemy Docker for Java Developers course.
- Line 03 – Line 04 copies the


Rajesh
Good