Caching in Spring RESTful Service: Part 2 – Cache Eviction
0 CommentsLast Updated on October 21, 2024 by jt
In my previous post Caching in Spring RESTful Service: Part 1, I discussed how to implement caching for queries on products.
Now, consider a scenario where you need to delete or update a product. The cache should be aware of these operations. Or else, the cache will return old product information.
To address such problems, we have to evict the cache whenever a user updates or deletes a product.
In this post, I will explain how to implement cache eviction in a Spring Boot RESTful API.
Implementing Cache Eviction for Product Deletion
I will continue with the Product REST service discussed in Part 1. The code of the service is available in Git.
To recall, the Product REST service has a Product domain entity, a Spring Data JPA repository, named ProductRepository, a service ProductService with a ProductServiceImpl implementation class.
The REST service also has a controller ProductController with endpoints to add a product and retrieve all products.
Let’s start with the ProductServiceImpl class by adding a service method deleteProductById(int id)to delete a product corresponding to its id.
Every time I delete a product, I want the entire content of the cache to be deleted as well.
This is the code for it.
@Caching(evict = {@CacheEvict(value = "allproductcache", allEntries = true),
                  @CacheEvict(value = "productcache", key = "#product.id")
         })

@Override
public Product deleteProductById(int id) {
        Product product = null;
        Optional optional = productRepository.findById(id);
        if (optional.isPresent()) {
               product = productRepository.findById(id).get();
               productRepository.deleteById(id);
            }
        System.out.println("Product deleted in database\n ");
        return product;
}
In the preceding code, Line 1-Line 2 marks the class with the @CacheEvict annotation. Doing so will evict the previously loaded cache of master data. Here the key-value allEntires = true removes all entries of the cache. Also, the product.id column of "productcache" is removed.
When you need to clear an entire cache region this option comes in very handy rather than evicting each entry.
The test code is this.
@Test
void givenProductToDeleteThenShouldEvictCache() {

      productService.addProduct(product1);
      productService.addProduct(product2);

      productService.deleteProductById(1);
      productService.getAllProducts();
      productService.getAllProducts();
      productService.getAllProducts();
      productService.getAllProducts();

      verify(productRepository,times(1)).findAll();
}
The test case adds a product and then deletes a product with id 1. Then it makes four calls to retrieve all the products.
Line 13 has a verify method. It checks that the product is loaded from the database only once after the deletion method. Post that, the cache returns the products.
The output on running the test is this.

Implementing Cache Eviction for Updating a Product
Let’s, add a service method updateProduct(Product product) to update a product and ensure that cache eviction happens as expected.
@CachePut(key = "#product.id")
@Override
public Product updateProduct(Product product){
      Product updateProduct = null;
      Optional optional = productRepository.findById(product.getId());
           if (optional.isPresent()){
           Product getProduct = productRepository.findById(product.getId()).get();
           getProduct.setPName(product.getPName());
           getProduct.setPrice(product.getPrice());
           updateProduct = addProduct(getProduct);
           }
      System.out.println("Product updated\n");
      return updateProduct;
  }
In the preceding code, @CachePut is used. It is a method level annotation. When you want to update the cache without interfering with the method execution, use this annotation.
The test code is this.
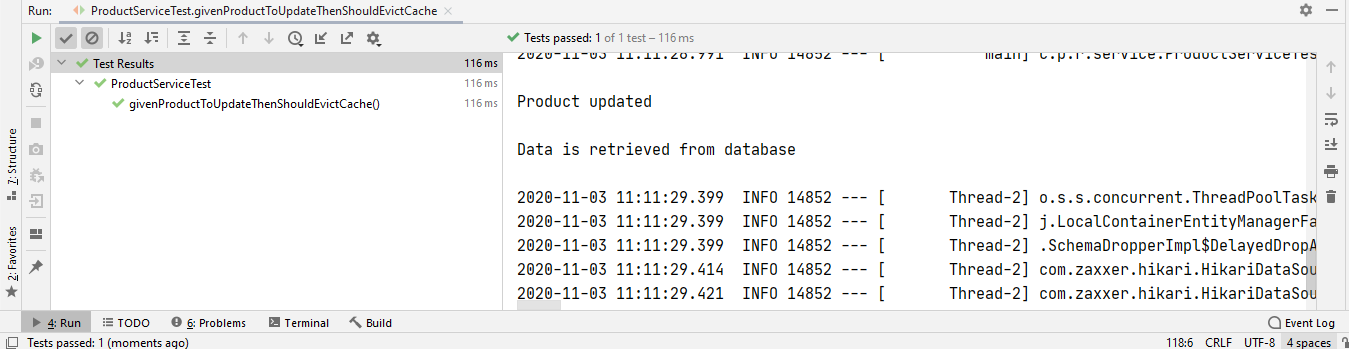
@Test
void givenProductToUpdateThenShouldEvictCache() {

     productService.addProduct(product1);
     productService.addProduct(product2);

      productService.updateProduct(product1);
      product1.setPName("Sample Product");

      productService.getAllProducts();
      productService.getAllProducts();
      productService.getAllProducts();
      productService.getAllProducts();

      verify(productRepository,times(1)).findAll();
}
In the preceding code Line 3- Line 4 adds two Product objects: product1 and product2. Line 8 updates the name of the product1. Then the code makes four calls to retrieve all the products.
At Line 15, there is a verify method. It checks that only once the product is loaded from the database after it gets updated. After that, the cache keeps returning the product without querying the database.
The output of the test is this.
Summary
In this post, I have only shown the basic caching mechanism. Spring provides several implementations of caching. Some examples are Ehcache3, Redis, Caffeine, Pivotal GemFire, and so on.
I have already written a post on Ehcache3 titled Using Ehcache 3 in Spring Boot.
Redis is also extensively used in enterprise applications to manage cache because of its ability to withstand failures and provide uninterrupted services.
Redis is blazing fast and favors high performance over consistency.
On the other hand, if you looking for high scalability with high concurrency then you can go for Pivotal GemFire.
You can find the source code of this post on Github.
For in-depth knowledge of the Spring Framework, check my Udemy Best Seller Course Spring Framework 5: Beginner to Guru.