Spring REST Docs
1 CommentLast Updated on May 2, 2021 by jt
When developing REST APIs, it is important to have accurate and well-structured documentation of your API. This documentation is the reference point for anyone who wants to use your API. Spring REST Docs helps you to achieve it.
Spring REST Docs take a different approach than any other traditional tools like Swagger. For more information on Swagger, you can refer my post Spring Boot RESTful API Documentation with Swagger 2.
Compared to Swagger which adds the documentation information in the REST controller, Spring REST Docs uses Test-Driven approach of using test classes to produce REST documentations. To be precise, you write documentation information in the tests of your controllers.
This approach is more convenient as tests are the first place to look at to understand the functionality of a project. This is because tests remain up to date and in sync with the implementation.
In this post, I will explain how to generate REST API documentation with Spring Rest Docs.
POM Dependency
To use Spring REST Docs you will need to add the following dependency in your pom.xmlfile.
 <dependency>
    <groupId> org.springframework.restdocs</groupId>
    <artifactId>spring-restdocs-mockmvc</artifactId>
    <scope>test</scope>
 </dependency>
Spring REST Docs Example
For this post, we will create a simple Spring Boot REST service to perform operations on user resources.
We wil start by creating a User domain class.
Note: To cut down boilerplate code, I have used Lombok. If you are new to Lombok, I suggest reading my series of post on Lombok.
User.java
@AllArgsConstructor
@NoArgsConstructor
@Data
@ToString
@Getter
@Setter
public class User{
   private int userId;
   private String userName;
   private String email;
  }
The code of the controller class, UserController is this.
UserController.java
@RestController
public class UserController {
   List users = Arrays.asList(
           new User(001,"John","[email protected]"),
            new User(002,"Henry","[email protected]")
   );

   @GetMapping("/users")
   public List getUsers(){
       return users;
   }
}
The preceding UserController is a Spring REST controller class with a single endpoint to return a list of all users.
Spring REST Docs Configuration
Coming to the main part, we will perform the following steps to generate REST documentation.
- Writing Unit Test Cases
- Generating Documentation
- AsciiDoc Conversion
- Joining the generated snippets
Writing Unit Test Cases
Spring REST Docs use the test cases to generate accurate and updated documentation for the REST API.
This is the code for the controller test class, UserControllerTest.
@ExtendWith(SpringExtension.class)
@WebMvcTest(UserController.class)
class UserControllerTest{

@Autowired
private MockMvc mockMvc;

@Test
public void testGetUserName() throws Exception {
this.mockMvc.perform(MockMvcRequestBuilders.get("/users"))
.andExpect(status().isOk())
.andExpect(MockMvcResultMatchers.content().string(containsString("John")));
}
This is a simple test case that uses MockMVc to test the controller endpoint and assert that the controller is returning the expected response. Here we are using Spring Test that I have cover in one of my earlier post on Testing Spring Boot RESTful Services.
Generating the Documentation
We will now configure Spring REST Docs in the test class we have just written.
This is the modified code of the test class to configure Spring REST Docs.
@ExtendWith(SpringExtension.class)
@WebMvcTest(UserController.class)
@AutoConfigureRestDocs(outputDir = "target/generated-snippets")
class UserControllerTest {

@Autowired
private MockMvc mockMvc;

@Test
public void testGetUserName() throws Exception {
this.mockMvc.perform(MockMvcRequestBuilders.get("/users"))
.andExpect(status().isOk())
.andExpect(MockMvcResultMatchers.content().string(containsString("John"))).andDo(document("users/getUserByName"));
}
}
In Line 3 @AutoConfigureRestDocs annotation is used which takes a directory location as an argument. This directory will store the generated documentation snippets.
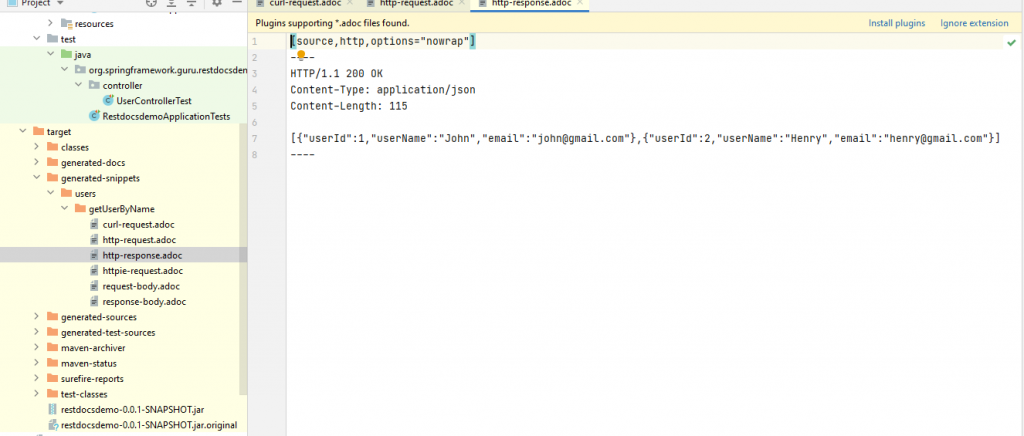
Run the test. Once the test passes successfully, a sub-folder under the target/generated-snippets is created.
Expand the generated-snippets folder of your proect. You will find the sub-folder users/getUserByName matching with the argument passed to @AutoConfigureRestDocs with several .adoc files.
AsciiDoc Conversion
The next step is to convert the generated documentation snippets to a readable format. To do so, we will use the AsciiDoctor maven plugin.
This is the plugin configuration in the pom.xml file.
  <plugin>
	<groupId>org.asciidoctor</groupId>
	<artifactId>asciidoctor-maven-plugin</artifactId>
	<version>1.5.8</version>
	 <executions>
	  <execution>
	   <id>generate-docs</id>
	   <phase>prepare-package</phase>
	    <goals>
		<goal>process-asciidoc</goal>
	    </goals>
		<configuration>
		 <backend>html</backend>
		 <doctype>user</doctype>
		</configuration>
	  </execution>
	 </executions>
	 <dependencies>
	  <dependency>
		<groupId>org.springframework.restdocs</groupId>
		<artifactId>spring-restdocs-asciidoctor</artifactId>
		<version>${spring-restdocs.version}</version>
	  </dependency>
	 </dependencies>
 </plugin>
Joining the Generated Snippets
Next, you need to create a new file named index.adoc under the directory asciidoc to bring all the .adoc files to a single place.
When you run your unit test cases, the file will be populated with references to the .adoc files.
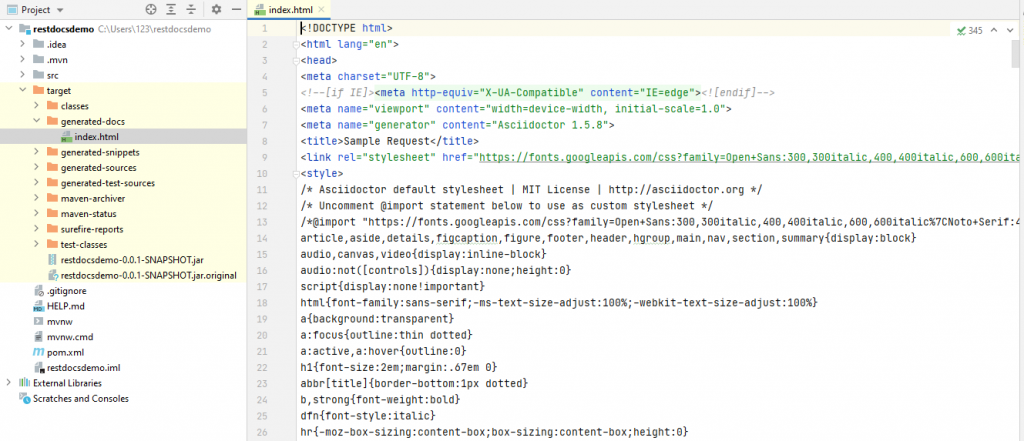
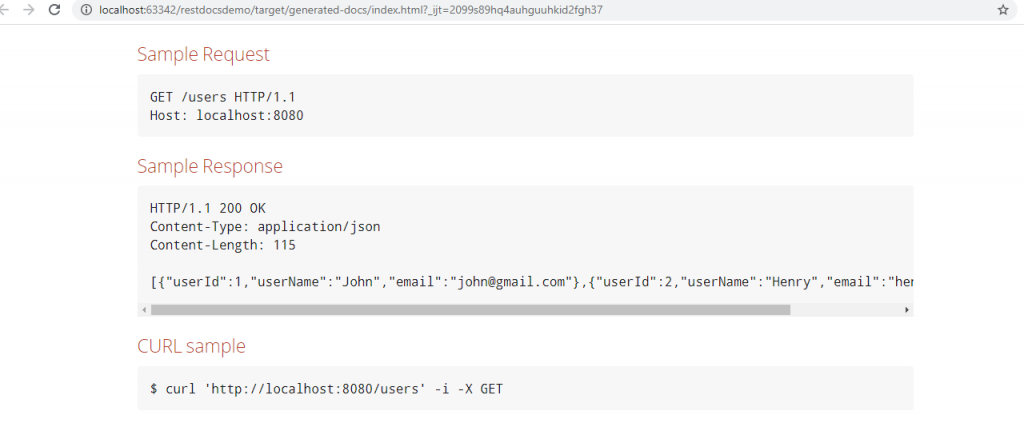
Now, on running mvn package, the final HTML documentation gets generated in the target/generated-docs directory.
This figure shows the generated documentation on the browser.
Summary
In this post, I have explained the basic steps for generating documentation using Spring REST Docs. There are many reasons to use it. One obvious reason is that documentation configuration code is not cluttered in your controller. Also, as it takes a test-driven approach, you can ensure the accuracy of your API documentation.
You can learn more about Spring REST Docs here.
Another option widely used in the industry for REST API documentation is Open API. While Spring Rest Docs is part of the Spring Framework, Open API is a specification.
Open API provides a language-agnostic way to describe a RESTful API with a YAML document. This document can be used to generate documentation and methods for API endpoints.
I have a Udemy Best Seller course OpenAPI: Beginner to Guru that you can access to learn how to generate high-quality documentation of real-world RESTful services.
You can find the source code of this post on Github.
For in-depth knowledge on generating REST documentations using Swagger, you can check my Udemy Best Seller Course Spring Framework 5: Beginner to Guru


Peter
The above example didn’t generate anything for me un less my test class looked like this:
(Using Spring Boot 3)
@ExtendWith({RestDocumentationExtension.class, SpringExtension.class})
@WebMvcTest(UserController.class)
@AutoConfigureRestDocs(outputDir = “target/generated-snippets”)
class UserControllerTest {
private MockMvc mockMvc;
@BeforeEach
public void setUp(WebApplicationContext webApplicationContext, RestDocumentationContextProvider restDocumentation) {
this.mockMvc = MockMvcBuilders.webAppContextSetup(webApplicationContext)
.apply(documentationConfiguration(restDocumentation))
.alwaysDo(document(“{method-name}”, preprocessRequest(prettyPrint()), preprocessResponse(prettyPrint())))
.build();
}
@Test
public void testGetUserName() throws Exception {
this.mockMvc.perform(MockMvcRequestBuilders.get(“/users”))
.andExpect(status().isOk())
.andExpect(MockMvcResultMatchers.content().string(containsString(“John”)));
}
}