Scheduling in Spring Boot
0 CommentsLast Updated on February 4, 2022 by jt
We use scheduling to schedule jobs in a Spring Boot application. For instance, you can implement scheduling to perform some task at a specific time, or repeat after a fixed interval.
In this post, you’ll learn how to use the Spring @Scheduled annotation to configure and schedule tasks.
Spring Boot @Scheduled Annotation Example
Let’s say you want to run a job every 5 seconds. You can achieve it by following the below steps:
Step 1: @EnableScheduling annotation
Add the @EnableScheduling annotation to the main class.
It is a Spring Context module annotation that internally imports SchedulingConfiguration.
The code for the Main class is this.
SchedulingDemoApplication.java
@EnableScheduling
@SpringBootApplication
public class SchedulingDemoApplication {
public static void main(String[] args) {
     SpringApplication.run(SchedulingDemoApplication.class, args);
  }
}
Step 2: @Scheduled annotation
Add Spring Boot @Scheduled annotation on the methods that you want to schedule.
You need to ensure two conditions while annotating a method with @Scheduled:
- The method should typically have a void return type (if not, the returned value will be ignored).
- The method should not expect any parameters.
Let us look into some scheduling use cases.
Case 1: Schedule a Task at a Fixed Delay
In this case, the duration between the end of the last execution and the start of the next execution is fixed. The task always waits until the previous one is finished.
The code for the above case is this.
SchedulingDemoApplication.java
@Scheduled(fixedDelay = 10000)
public void run() {
  System.out.println("Current time is :: " + Calendar.getInstance().getTime());
}
Use this option when the previous execution has to be completed before running again.
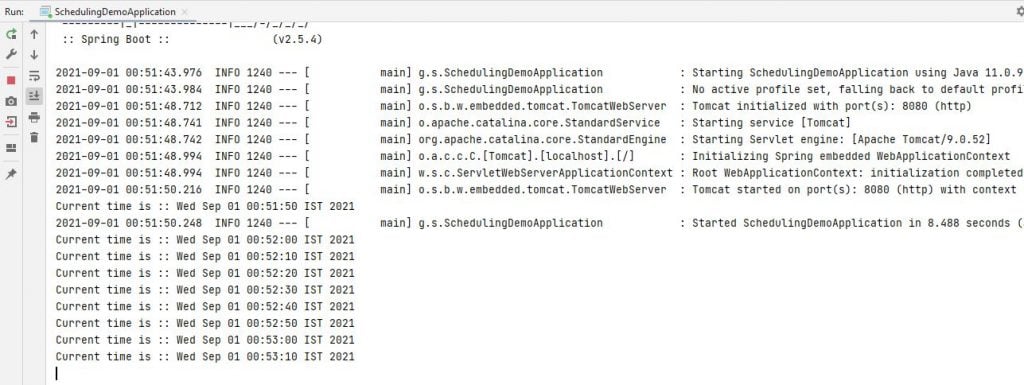
The output for the preceding code is this.
Case 2: Schedule a Task at a Fixed Rate
In this use case, each execution of the task is independent.
This is the code for the second case.
SchedulingDemoApplication.java
@Scheduled(initialDelay = 1000, fixedRate = 10000)
public void run() {
  System.out.println("Current time is :: " + Calendar.getInstance().getTime());
}
Here, the scheduled tasks don’t run in parallel by default. So even if we used fixedRate, the next task won’t be invoked until the previous one is done.
This is the output for the preceding code.
When to Use Which ?
We can run a scheduled task using Spring’s @Scheduled annotation. However, based on the properties fixedDelay and fixedRate, the nature of execution changes.
The fixedDelay property ensures that there is a delay of n millisecond between the finish time of an execution of a task and the start time of the next execution of the task. For dependent jobs, it is quite helpful.
The fixedRate property runs the scheduled task at every n millisecond. It doesn’t check for any previous executions of the task. This is useful when all executions of the task are independent.
Case 3: Schedule a Task using Cron Expressions
A cron expression is a string consisting of six or seven subexpressions (fields) that describe individual details of the schedule. These fields, separated by white space, can contain any of the allowed values with various combinations of the allowed characters for that field.
Sometimes delays and rates are not enough, and we need the flexibility of a cron expression to control the schedule of our tasks.
Let us take an example of scheduling a task that is to be executed at 10 AM on the 10th day of every month.
This is the code for the preceding example.
SchedulingDemoApplication.java
@Scheduled(cron = "0 10 10 10 * ?")
    public void scheduleTask() {
      System.out.println("Current time is :: " + Calendar.getInstance().getTime());
}
With this configuration, Spring will schedule the annotated method to run at 10 AM on the 10th day of every month.
You can find the source code of this post here on Github.
For in-depth knowledge on scheduling jobs in Spring Boot Microservices application, you can check my Udemy Best Seller Course Spring Boot Microservices with Spring Cloud Beginner to Guru


